


Figuring out the best glue for plastic models really comes down to the job you need it to do. For most of your standard polystyrene kits, solvent cement is king. It doesn’t just stick parts together; it chemically welds them into a single, seamless piece. But the moment you bring dissimilar materials into the mix, like resin or metal photo-etch, you’ll need to reach for a cyanoacrylate (CA or super glue) instead.
Choosing the Right Glue for Your Model
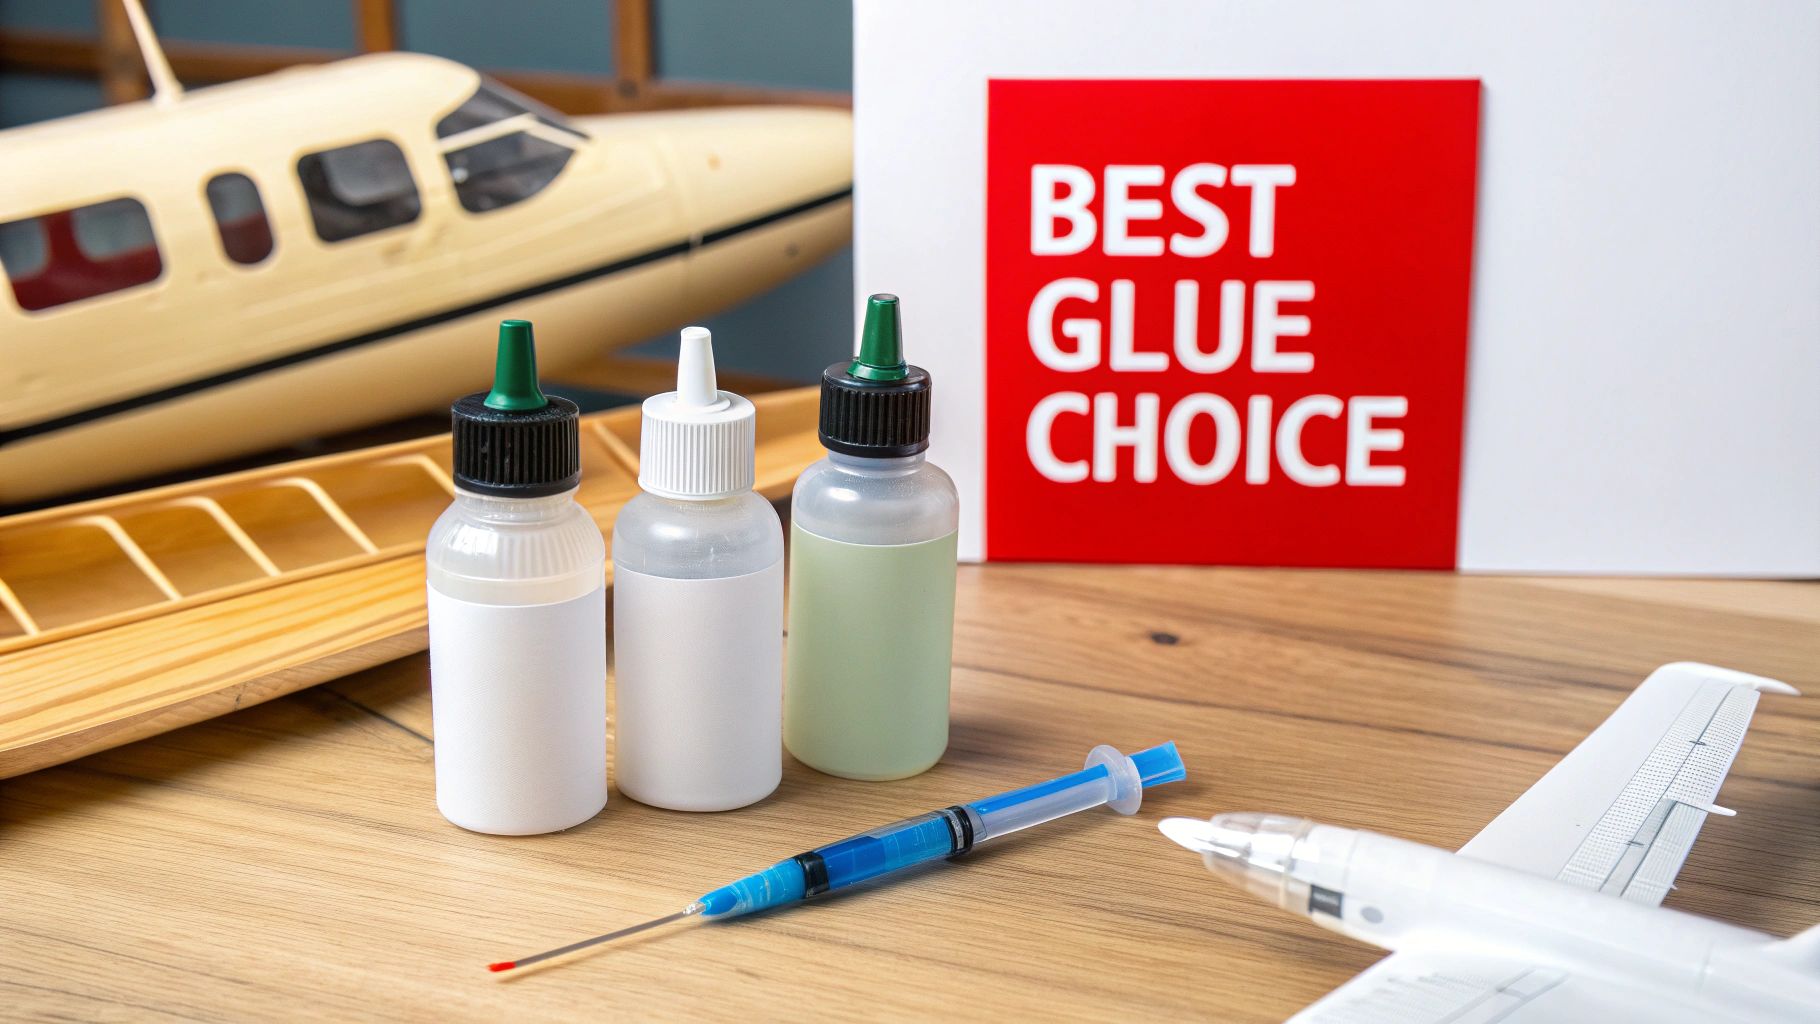
Picking the right adhesive is one of those foundational skills every model builder has to master. The glue you choose has a massive impact on the strength of the final assembly, how clean your seams look, and whether you can even work with different materials in the first place. The wrong glue leads to weak joints, melted plastic, or a frustrating mess. The right one makes the entire process feel smooth and professional.
Getting a handle on the main types of adhesives is the key to making smart choices on your workbench. Each one has a specific job and shines in different situations.
- Solvent Cements are purpose-built for polystyrene and ABS plastics. They work by melting the plastic surfaces just enough to fuse them together, creating a true chemical weld.
- Cyanoacrylate Adhesives (you probably know them as CA or super glue) create a strong surface bond. This makes them perfect for attaching tiny photo-etched metal parts, resin details, or for making quick, on-the-fly repairs.
- Two-Part Epoxies are the heavy lifters. They offer incredible structural strength and are fantastic at filling gaps, which makes them ideal for heavy components or joints that don't quite line up perfectly.
The core idea is simple: match the adhesive's strengths to the material you're using and the kind of joint you're creating. A thin, watery cement is perfect for a tight-fitting seam where you need capillary action to do the work, but a two-part epoxy is your best bet for a poorly fitting joint that needs serious structural support.
Sometimes, looking at how other fields tackle similar problems can offer some great insights. For instance, this guide to double tape adhesive for device repair shows how material properties and bond requirements are just as critical in electronics. It reinforces the idea that there's no single "best" adhesive—only the right one for the task.
To make things a bit easier, I've put together a quick reference table to help you get started.
Quick Reference Guide to Plastic Model Glues
This table breaks down the most common adhesives you'll encounter in the hobby, giving you a quick snapshot of what to use and when. Think of it as your cheat sheet for the workbench.
| Adhesive Type | Primary Use Case | Best For Plastic Types | Bond Type | Setting Time |
|---|---|---|---|---|
| Solvent Cement | Seamlessly joining polystyrene parts | Polystyrene, ABS | Chemical Weld | Fast (10-30 seconds) |
| Cyanoacrylate (CA) | Bonding dissimilar materials (metal, resin) | Most plastics, metal, resin | Surface Adhesion | Very Fast (2-10 seconds) |
| Two-Part Epoxy | Structural bonds and large gap filling | All plastics, metal, wood | Mechanical/Chemical | Slow (5-30 minutes) |
Having this basic knowledge will help you make a more informed choice right from the start of your project, saving you time and preventing potential mishaps down the line.
Understanding How Each Adhesive Works
To pick the right glue for your plastic models, you need to know what’s actually happening on a microscopic level. It’s not just about getting things to stick; different adhesives work in fundamentally different ways. Understanding the science behind the bond is the secret to creating strong, clean assemblies every time.
Some glues create a simple surface-level grip, while others literally melt two pieces of plastic into one. That distinction dictates everything—from how you apply it to which plastics it will even work on. Getting this right is what separates a decent build from a professional one.
The Chemical Weld of Solvent Cements
Let’s get one thing straight: solvent cement isn't really "glue" at all. Think of it as a chemical welding agent. When you apply it to plastics like polystyrene or ABS, the solvent gets to work, temporarily melting and softening the surface of each part.
As you press the two softened surfaces together, they flow into one another. The solvent then evaporates, the plastic re-hardens, and what you’re left with is a single, solid piece. The bond isn’t on the plastic; it is the plastic, making it incredibly strong.
Key Insight: This welding action is why solvent cements are the undisputed champions for creating invisible seams. Since the bond is a fusion of the original parts, not an extra layer of material, you can sand and paint over it without leaving a trace of the joint.
This unique process is also why solvent cements are specialists. They only work on plastics they can melt, like the polystyrene and ABS common in model kits. They’re completely useless on resin, metal, or clear acrylics, but for the right job, they are absolutely essential.
The Rapid Surface Bond of Cyanoacrylate
Cyanoacrylate (CA), or what most of us call super glue, operates on a totally different principle: anionic polymerization. In simple terms, CA glue reacts instantly to the microscopic traces of moisture found on just about any surface.
This reaction kicks off a chemical chain reaction, causing the glue’s molecules to link up into long, powerful polymer chains. This creates a tough, plastic-like mesh that cures in just a few seconds, forming an exceptionally strong bond right on the surface of the parts.
Because it just needs a little moisture to work, CA glue is the ultimate multi-tasker. It can bond all sorts of dissimilar materials, like:
- Photo-etched metal details to a plastic canopy.
- Resin aftermarket parts to a polystyrene fuselage.
- Vinyl figures to a diorama base.
Of course, that speed is both a blessing and a curse. It’s fantastic for quick assembly, but it leaves you with virtually no time to reposition parts if you get the alignment wrong.
The Structural Strength of Two-Part Epoxy
Two-part epoxies create their powerful bond by mixing a resin with a hardener. Once you combine them, a chemical reaction begins, causing the mixture to cross-link and cure into an extremely hard, durable solid. This bond is both mechanical and chemical, giving it immense strength.
Unlike solvent cements that fuse parts or CA glues that add a thin bonding layer, epoxy is a true gap-filling structural adhesive. It doesn’t just stick things together; it can fill large voids and create a solid bridge between poorly fitting parts, adding serious structural integrity to the model.
Adhesives this powerful are a big deal, and the market shows it. The global plastic adhesives market was valued at USD 8.09 billion in 2023 and is projected to keep growing. This trend reflects a rising demand for advanced bonding solutions in both industrial manufacturing and the hobby world. You can read more about the trends in the plastic adhesives market to see where things are headed.
Comparing the Top Adhesive Types for Models
Figuring out the best glue for a model isn't a one-size-fits-all deal. It's a classic case of using the right tool for the right job. The perfect adhesive for getting a mirror-smooth fuselage seam on an aircraft is totally wrong for attaching a hefty resin turret to a tank. Let's move past the simple pros and cons and dig into how solvent cements, cyanoacrylates, and epoxies actually perform in real-world modeling.
We'll look at each glue based on what really matters for your build: bond strength, cure time, viscosity, and how well it fills gaps. Once you get a feel for these differences, you'll be able to grab the right bottle for every single task your project throws at you.
Solvent Cements: The Welders
Solvent cements are the absolute bedrock of plastic modeling, especially for kits made from polystyrene or ABS. They don't just stick things together; they work by chemically melting the surface of the plastic. When the parts are joined, the melted plastic fuses, creating a genuine weld that's just as strong as the plastic around it. This is the secret to those invisible seams every modeler chases.
You'll generally run into two types:
- Thin Solvent Cements: This stuff is watery and works through capillary action. You just hold the parts together, touch the applicator to the seam, and the cement zips right into the join, welding it from the inside out. It's incredibly clean and the go-to for precise fits, like joining wing halves or a tank hull.
- Thick or Gap-Filling Cements: With a more gel-like consistency, these are applied to one part before joining. They melt the plastic a bit more aggressively and can fill in small gaps or imperfections, which is a lifesaver for older kits or joints that don't line up perfectly.
Key Scenario: You're assembling the main fuselage of a 1/48 scale fighter jet. A thin solvent cement is your best friend here. Its capillary action creates a permanent, seamless weld that, after a quick sanding, completely vanishes under a coat of paint. For a deeper dive into how different brands of these welders stack up, check out our comparison of ScaleCoat ProBond vs. Plastruct Plastic Weld.
Cyanoacrylates: The All-Rounders
Cyanoacrylate (CA), or what everyone just calls super glue, is easily the most versatile adhesive on any modeler's workbench. Unlike solvents, CA works by creating a surface-level bond through a super-fast chemical reaction. This means it can join all sorts of materials that solvents can't touch, like resin, metal photo-etch, wood, and even different types of plastic.
CA glues come in different thicknesses, each with its own job:
- Thin CA: Just like thin solvent, it's watery and sets in seconds. It's brilliant for wicking into tight cracks or attaching tiny photo-etched parts where you need a quick, strong bond with zero visible glue.
- Medium CA: This is your general-purpose workhorse. It's a bit thicker, giving you a few extra seconds to get the part positioned just right while still grabbing fast and hard. It can even fill tiny gaps.
- Thick or Gel CA: With a much slower cure time and a gel formula, this type is perfect for filling larger gaps or bonding parts with uneven surfaces. It provides serious structural strength.
The speed and versatility of CAs have made them a must-have in modern modeling. In fact, instant adhesives are a massive part of the global adhesives market, valued at USD 2.86 billion in 2024 and expected to hit USD 4.60 billion by 2032. This boom is fueled by new formulas that are more flexible and heat-resistant, making them even better for the fine-detail work we do. You can find more data about the instant adhesives market and its growth on dataintelo.com.
Key Scenario: You're fitting a detailed resin cockpit tub inside a polystyrene aircraft fuselage. A medium-viscosity CA glue is the perfect choice. It gives you an instant, rock-solid bond between the two different materials and fills any small gaps between the resin part and the plastic interior walls.
Two-Part Epoxies: The Structural Specialists
When you need a bond that can handle serious stress or fill a huge gap, it's time to break out the two-part epoxy. By mixing a resin and a hardener, you kick off a chemical reaction that creates an incredibly strong, rigid bond. Epoxies stick to almost anything—plastic, metal, resin, you name it.
Their biggest advantage is pure structural integrity. Once cured, the epoxy is extremely hard and can be sanded, drilled, and shaped just like plastic, becoming a structural part of the model itself. This is a game-changer for attaching heavy components or reinforcing weak points in a kit. The trade-off is the longer curing time, which can be anywhere from five minutes to several hours, depending on the formula.
Key Scenario: You need to secure a heavy, solid resin turret onto a plastic tank hull. A 5-minute epoxy provides the immense strength needed to hold that weight securely. It also fills the large, uneven gap that often exists between the turret ring and the hull, creating a permanent connection that won't snap off under its own weight.
Choosing between these adhesives really is about matching the glue to the job. Solvents create seamless finishes on polystyrene, CA glue gives you speed and versatility for mixed materials, and epoxy delivers the brute strength for your most demanding structural challenges.
Detailed Adhesive Feature Comparison
To make the choice even clearer, let's break down how these glues stack up against each other across the most important features for a model builder.
| Feature | Solvent Cement | Cyanoacrylate (Super Glue) | Two-Part Epoxy | PVA Glue |
|---|---|---|---|---|
| Primary Use | Welding polystyrene & ABS | All-purpose, multi-material | High-stress structural bonds | Clear parts, canopies, scenery |
| Bond Type | Chemical Weld (Fuses Plastic) | Surface Bond (Adhesion) | Surface Bond (Structural) | Surface Bond (Weak) |
| Strength | Very High (as strong as plastic) | High (but brittle) | Extremely High (very rigid) | Low (not for structural parts) |
| Cure Time | 5-30 minutes (full cure 24+ hrs) | Seconds to minutes | 5 mins to several hours | 15-60 minutes (full cure 24 hrs) |
| Gap Filling | Poor (thin) to Fair (thick) | Poor (thin) to Good (gel) | Excellent | Poor (shrinks when drying) |
| Material Use | Polystyrene, ABS only | Nearly all materials | Nearly all materials | Porous materials, clear plastic |
| Clean-Up | Difficult (melts plastic) | Acetone/Debonder | Difficult once cured | Water |
This table really highlights the specific strengths and weaknesses of each type. You can see why a modeler's bench isn't complete without having at least a couple of these on hand. You wouldn't use PVA to hold on a tank turret, and you wouldn't use epoxy for a delicate canopy. Having the right adhesive ready to go makes every build smoother and stronger.
Mastering Application Techniques for Flawless Results
Picking the right glue is only half the battle. The real magic in model building lies in how you apply it. Flawless seams, rock-solid joints, and a clean, professional finish all come from good technique, not just the bottle of adhesive you’re using. Knowing how to handle each type of glue will get the best performance out of your products and turn a good build into a great one.
Every glue has its own personality and demands a different approach. A method that works perfectly for a watery-thin solvent cement will make a complete mess if you try it with thick super glue. Understanding these little details is what separates the novices from the seasoned builders and gives you the confidence to tackle any assembly.
This decision tree gives you a quick visual on which adhesive is best for the job, helping you choose the right application method from the start.
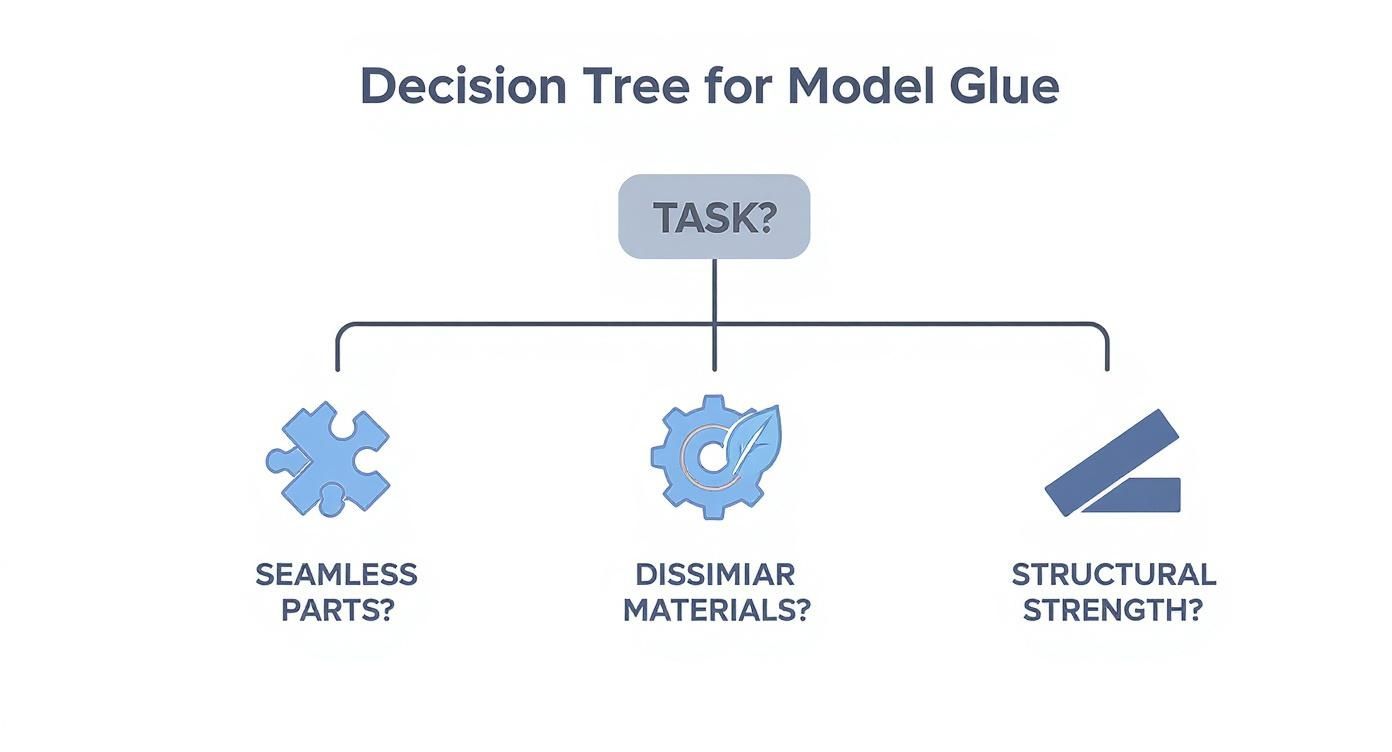
As the chart shows, the task at hand—whether it’s creating invisible seams, joining different materials, or locking in structural strength—is what should guide your choice of glue.
Precision with Solvent Cements
Solvent cements are the secret to those seamless joins that make a model look like it was molded in one piece. The trick is to let capillary action do the work for you, especially with the ultra-thin formulas.
The process is incredibly clean and surprisingly simple:
- Dry-Fit Everything: Always, always test-fit your parts first. Make sure they line up perfectly without any weird gaps.
- Hold Them Tight: Press the two plastic parts together exactly where you want them to be.
- Touch the Seam: Just touch the tip of a fine brush or applicator to the join line. The thin cement will instantly wick its way into the seam, melting and welding the plastic from the inside out.
For this specific technique, a product like Ammo by Mig Jimenez Extra Thin Cement is perfect. It flows beautifully into seams and creates a seriously strong bond with almost zero risk of messing up the surface detail.
If you’re working with an older kit or have parts that just don’t want to line up perfectly, a thicker, gap-filling cement is what you need. Unlike its thin cousin, this type gets applied to one of the surfaces before you join the parts. Use a small amount to avoid a messy squeeze-out, then press the pieces together and hold them until they grab.
Taming Cyanoacrylate Glues
Cyanoacrylate (CA), or super glue, is a fantastic all-rounder but it’s famously unforgiving because of how fast it cures. Preparation and precision are key. For tiny photo-etched metal parts, put a micro-dot of thin or medium CA on with the tip of a toothpick or a dedicated microbrush.
Pro Tip: To get a handle on CA glue’s instant grab, use an accelerator. A quick, light mist from a spray bottle will cure the glue on the spot—a lifesaver for holding parts in awkward positions. On the flip side, always keep de-bonder nearby to dissolve any mistakes or excess glue without wrecking your model’s surface.
For bigger resin parts or anything that needs more structural beef, a gel or thick-viscosity CA is your best bet. The thicker formula buys you more working time to get the part positioned just right and does a great job filling small gaps for a stronger bond.
Applying Epoxy for Maximum Strength
When you need pure, unadulterated strength, two-part epoxies are the champions. They’re ideal for heavy resin components or joints that will be under stress. Getting the application right starts with a good mix.
Follow these steps every time for a bond you can trust:
- Mix It Right: Squeeze out equal amounts of the resin and hardener onto something disposable, like a scrap of cardboard.
- Combine Completely: Use a toothpick or mixing stick to stir the two parts together until the color and consistency are totally uniform. An incomplete mix is the #1 reason epoxy bonds fail.
- Apply and Position: Spread the mixed epoxy on one surface and join the parts. Most formulas, like a standard 5-minute epoxy, give you a few minutes of wiggle room before they start to set up.
- Clamp It Down: For heavy parts or joints under tension, use clamps or tape to hold everything securely while the epoxy fully cures. This usually takes several hours, but it ensures the bond reaches its absolute maximum strength.
Safe Handling and Workspace Ventilation
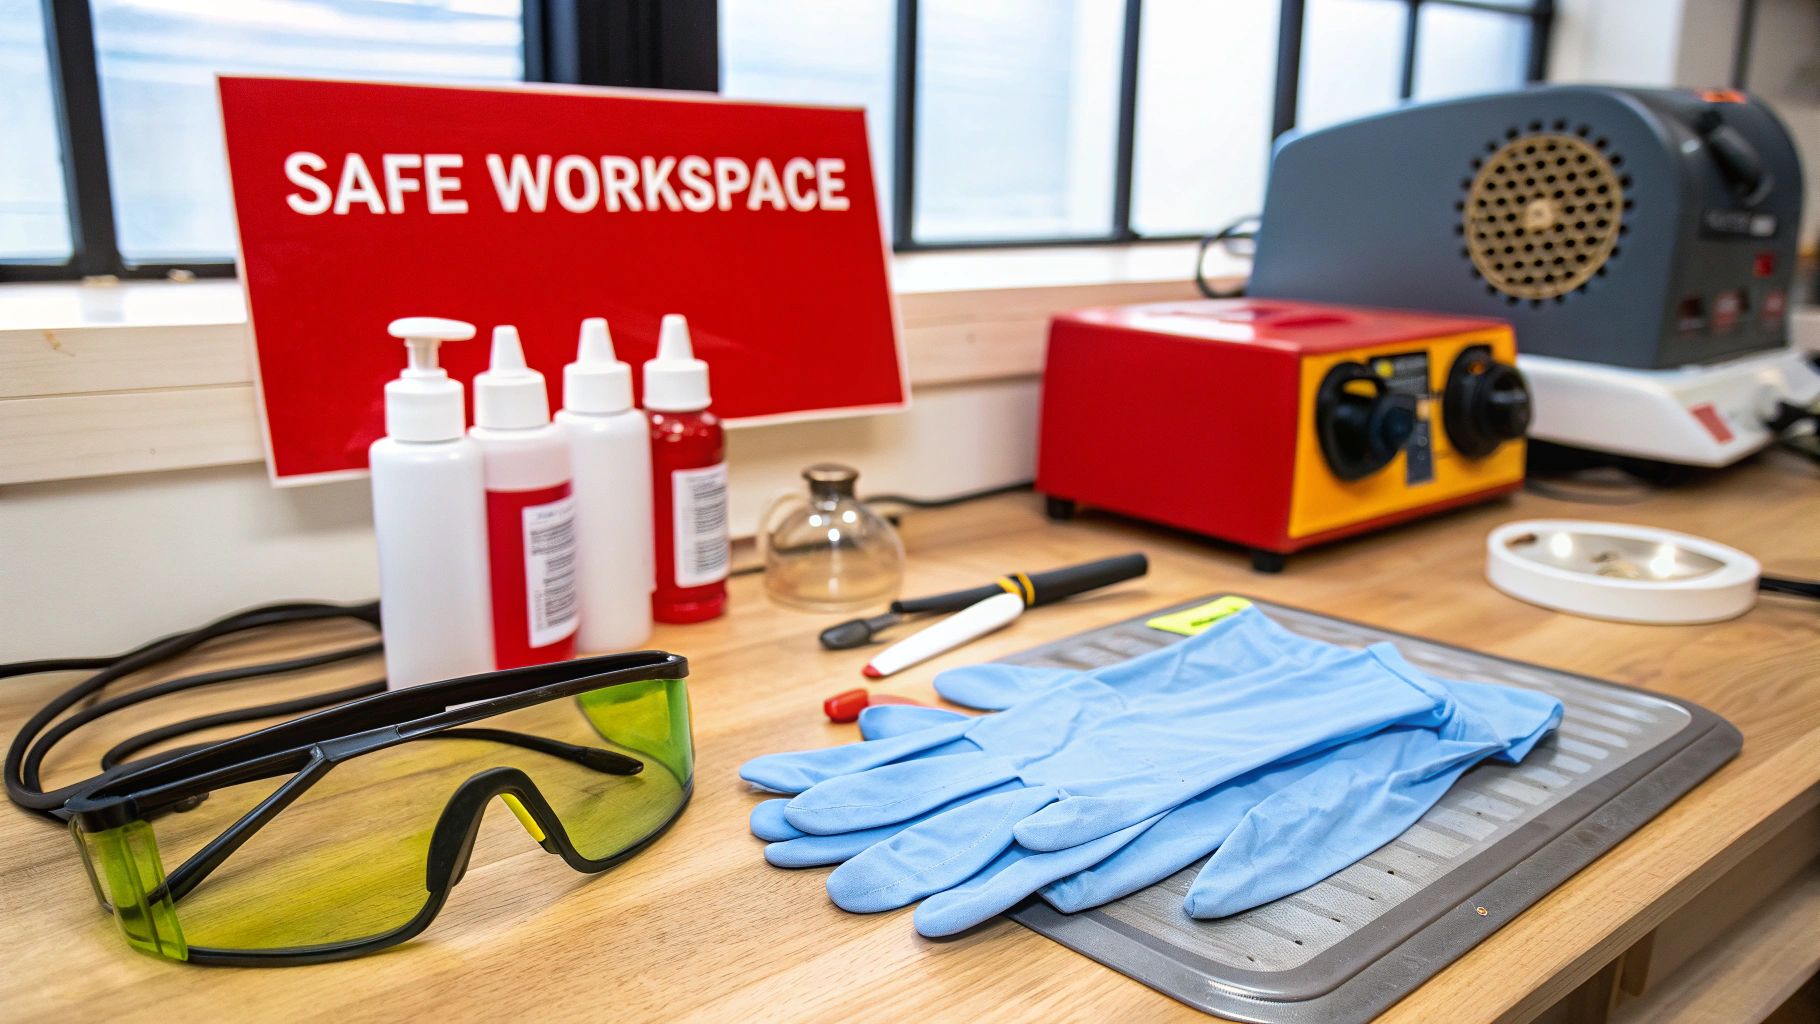
Picking the right glue is only half the battle; using it safely is what really matters. Many of the best adhesives, particularly solvent cements and certain superglues, release volatile organic compounds (VOCs). In a closed room, those fumes can be a real problem. Your health is the most valuable tool you have, so let's make sure we protect it.
A safe workspace isn’t an afterthought—it’s a sign of a serious modeler. Getting into good habits with fumes and skin contact from the start means you can enjoy building for a long, long time.
Creating a Well-Ventilated Workspace
Ventilation is your number-one defense against nasty fumes. Working in a stuffy room is a recipe for trouble, as vapors can build up fast and lead to headaches, dizziness, or worse. The idea is simple: get fresh air in and bad air out.
Here are a few ways to make it happen:
- Open a Window: It's the easiest thing you can do. Just cracking a window lets fresh air start circulating.
- Use a Fan: To take it a step further, put a small fan in the window pointing out. This will actively pull the fumes away from you and push them outside.
- Get a Fume Extractor: For the best protection, especially if you build frequently, a benchtop fume extractor is a fantastic investment. These units have carbon filters that suck in and trap harmful vapors right at the source.
Professional workshops rely on fume hoods for a reason—proper airflow is non-negotiable for safety. You can learn more about fume hood safety to see how the pros handle it. For your own hobby space, just make sure you have a steady flow of air every time you work.
Using Personal Protective Equipment
Beyond airflow, what you wear makes a huge difference. Personal protective equipment (PPE) is your direct barrier against chemicals. Even a tiny drop of some adhesives can irritate your skin, and we all know what happens when CA glue gets where it shouldn’t.
It's easy to protect yourself. Nitrile gloves are a must to keep chemicals off your hands. A good pair of safety glasses will shield your eyes from an accidental splash, which is a real risk with thin, watery cements that can flick off a brush without warning.
The craft glue market is massive—valued at USD 3.1 billion in 2023 and projected to hit USD 4.8 billion by 2030, thanks to the boom in DIY hobbies. With more products on the shelves than ever, knowing how to use them safely is critical. Storing your glues properly is just as important as using them safely, so be sure to check out our guide on how to store model glue safely to round out your safety knowledge. Making these simple habits part of your routine keeps you, and your hobby space, healthy.
Troubleshooting Common Glue and Seam Issues
Even the most seasoned modeler runs into frustrating glue problems now and then. We’ve all been there: a seam line you thought was gone mysteriously reappears after painting, or a pristine clear canopy gets fogged up by aggressive glue fumes. Knowing how to fix these common headaches is a critical skill that really separates a good build from a great one.
Most of these issues can be traced back to either your choice of adhesive or how you prepared the parts. The good news? Nearly every mistake is fixable with the right approach and a bit of patience. Once you learn these troubleshooting tricks, you’ll be able to save your work and get that flawless finish you’re after.
Fixing Ghost Seams and Sunken Lines
One of the most maddening problems in scale modeling is the ghost seam. This is a joint that looks absolutely perfect after sanding, only to show up again as a faint, sunken line once you lay down a coat of paint. This almost always happens when solvent cement hasn't fully cured before you start sanding and painting. The trapped solvent keeps evaporating for days, causing the plastic along the seam to shrink just enough to become visible.
To stop this from happening, give your model at least 24 hours for the solvent to completely outgas before you even think about touching it with sandpaper.
If a ghost seam does pop up, don't panic. The fix is pretty straightforward. Just apply a very thin layer of putty, like Tamiya Basic Putty thinned with lacquer thinner, right into the sunken line. Once it’s dry, carefully sand it flush with a high-grit sanding stick, prime it again, and that seam will be gone for good.
Dealing with CA Glue Crazing and Fogging
Cyanoacrylate (CA) glue is notorious for fogging clear plastic parts. As it cures, it releases fumes that can react with the plastic's surface, leaving a hazy, white residue called crazing. This can ruin a canopy or windshield in an instant.
To avoid this disaster, stick to these rules:
- Never use standard CA glue on clear parts. Just don’t do it.
- Always reach for a specialized clear-part cement or a simple PVA glue. These are formulated to be non-reactive and dry crystal clear.
- If you absolutely must use CA near clear parts, make sure you have massive airflow to whisk the fumes away before they can settle.
If fogging has already happened, you can often polish it out. Start with a coarse polishing compound and work your way down to a fine one. To really restore the clarity, finish by dipping the part in a clear gloss coat.
Frequently Asked Questions About Model Adhesives
Diving into the world of hobby adhesives always brings up a few questions, especially when you hit a snag on your workbench. Here are some clear, straightforward answers to the most common queries I hear from fellow modelers about picking and using the right glue.
Can I Use Regular Super Glue for My Models?
You technically can, but you really shouldn't. Hobby-specific cyanoacrylate (CA) glues are in a different league entirely. The super glue you grab at the hardware store is usually a one-size-fits-all medium viscosity that can be messy, unpredictable, and way too aggressive for delicate scale parts.
Hobby CA glues, on the other hand, come in multiple viscosities—thin, medium, and thick. This gives you the precision to handle different jobs, from wicking a super-thin glue into a tight seam to using a thick gel to fill a gap. Even better, many are formulated to prevent "fogging" or crazing on clear plastic parts, which is a classic rookie mistake when using generic super glues.
The real difference is control. Hobby-grade CA lets you pick the perfect formula for the job at hand. The result is a cleaner, stronger, and more professional-looking model than you'll ever get with a generic tube of glue.
What Is the Best Glue for Clear Plastic Parts?
This is a big one. Never use standard solvent cement or regular CA glue on clear parts like canopies, windows, or headlights. Solvents will chemically melt and warp the plastic, while the fumes from CA will cause irreversible fogging that permanently ruins the part’s clarity. I've seen it happen, and it's heartbreaking.
Your go-to choice should be a specialized clear-part cement or a simple PVA glue (like basic white school glue).
- Clear-Part Cement: These are specifically made to dry crystal clear without eating into transparent polystyrene.
- PVA Glue: Dries clear, gives you a surprisingly secure bond for non-structural parts, and any excess is easily wiped away with a damp cloth before it sets.
Using one of these ensures a solid hold without gambling with the flawless finish of your transparent pieces.
How Do I Remove Excess Dried Glue?
Fixing a glue mistake depends entirely on what kind of glue you used. If you've got a blob of dried solvent cement, which has chemically welded the plastic, your only real option is to sand it down. Start carefully with a medium-grit sandpaper, work your way to finer grits, and then polish the area to bring back the shine.
For cured cyanoacrylate glue, you have a couple of options. A CA de-bonder can dissolve the glue, but use it sparingly with a microbrush—it can easily damage paint and soften the plastic underneath. The more common method is to carefully scrape it away with a sharp hobby knife or simply sand it off. It takes a bit more elbow grease, but it's often the safest bet.
At Fusion Scale Hobbies, we stock a huge selection of adhesives for every modeling job, from ultra-thin cements for perfect seams to versatile CA glues for multi-media projects. You'll find exactly what you need for your next build in our extensive collection.