


Applying model decals the right way all starts with having the proper tools within reach. Before you even think about putting a decal in water, it’s worth taking a few minutes to get your workspace set up. This simple step can be the difference between a frustrating mess and a flawless finish.
Gathering Your Essential Decal Toolkit
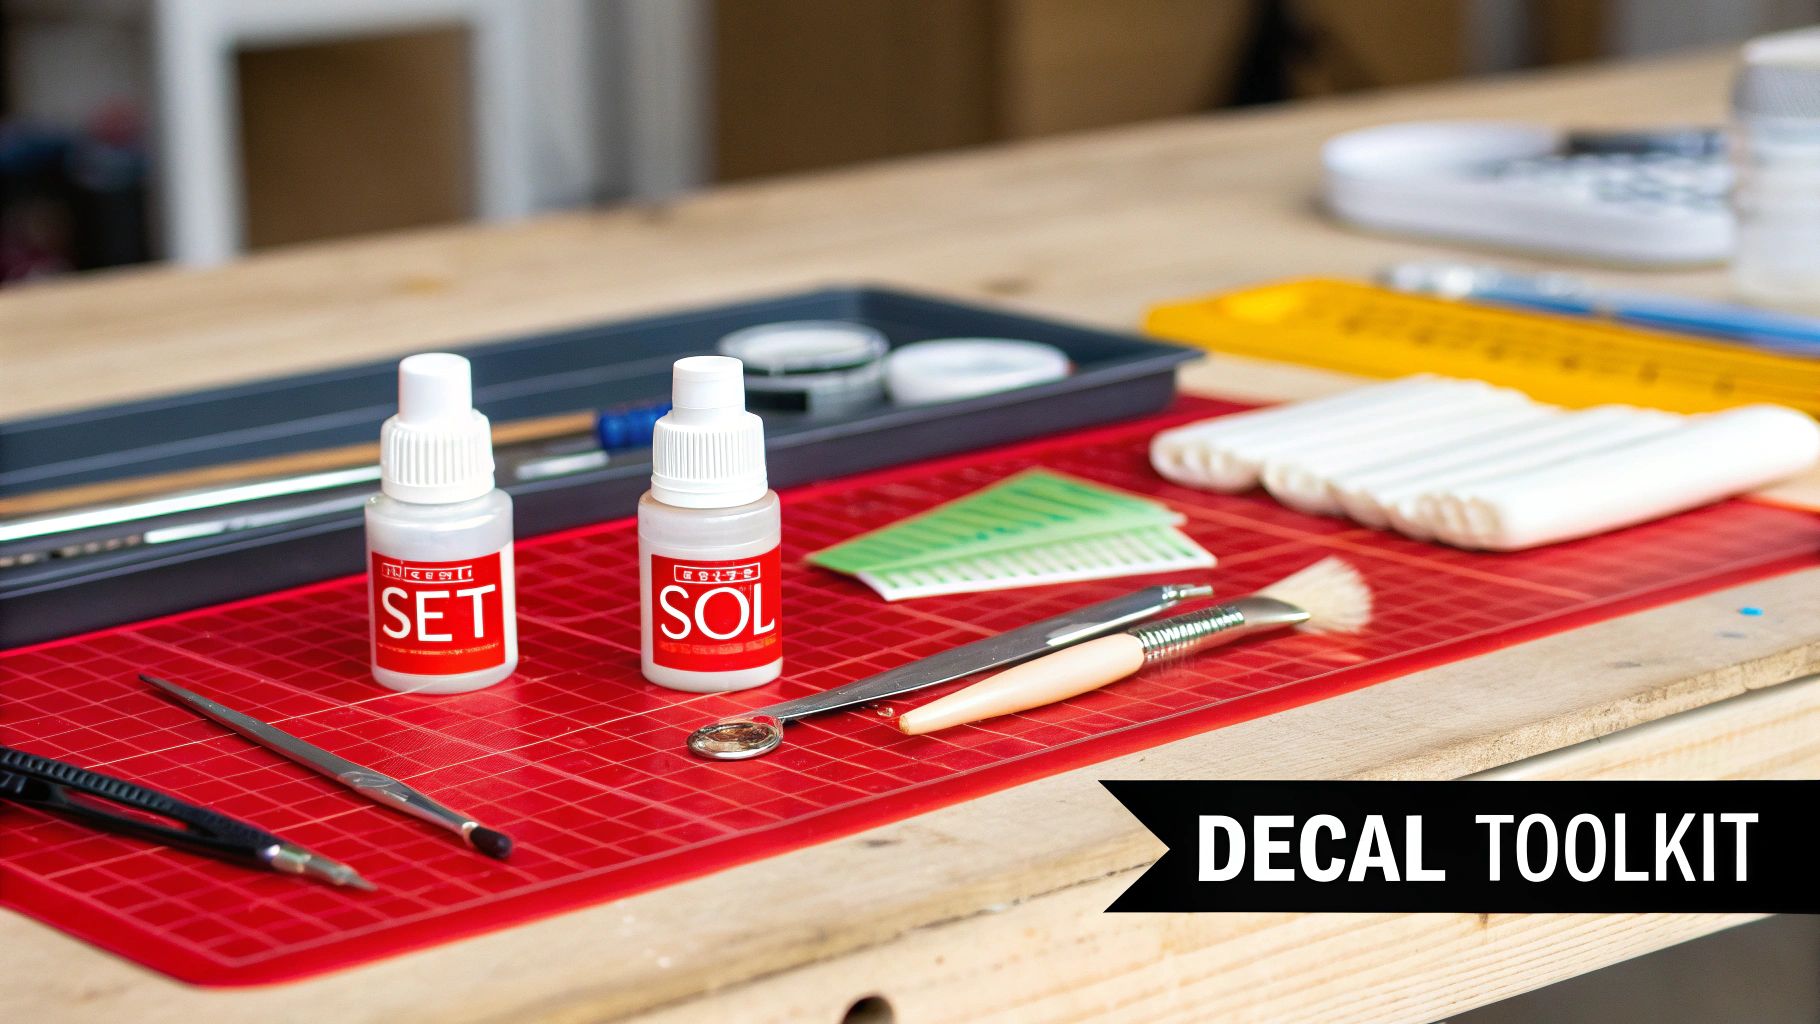
Think of this as your pre-flight checklist. The goal isn't just to get the decal to stick; it's to make it look like it was painted on at the factory. Having a sharp hobby knife, some good tweezers, a couple of soft brushes, and the right decal solutions on hand will make the entire process smoother and far more enjoyable.
To make it easier, here's a quick rundown of what I keep on my bench whenever I'm tackling decals.
Decal Application Toolkit Checklist
This table breaks down the essential gear—and a few advanced items—that will elevate your decal work from good to great.
| Tool | Primary Use | Pro Tip |
|---|---|---|
| Hobby Knife (#11 Blade) | Precisely cutting decals from the sheet | Use a fresh blade. A dull knife can tear the decal paper and ruin the marking. |
| Fine-Tipped Tweezers | Handling wet decals without damage | Go for a rounded or flat-tipped pair to avoid puncturing the delicate decal film. |
| Soft Paintbrush | Positioning the decal and applying solutions | Dedicate a specific brush just for decals so you don’t contaminate it with old paint. |
| Cotton Swabs | Soaking up excess water and pressing decals down | Cut them in half. The firm cardboard edge is perfect for burnishing decals into panel lines. |
| Decal Setting Solution | Preps the surface and improves adhesion | Apply a thin layer to the model before sliding the decal on to prevent air bubbles. |
| Decal Softening Solution | Melts the decal into surface details | Essential for conforming decals over rivets, curves, and complex shapes for a painted-on look. |
| Self-Healing Cutting Mat | Provides a safe surface for cutting decals | Protects your blade and your desk, ensuring clean, straight cuts every time. |
With these tools ready to go, you're set up for success.
Cutting and Handling Tools
Your journey starts with separating the decal from the sheet cleanly. A sharp #11 hobby knife blade and a self-healing mat are your best friends here. They allow you to trim right along the edge of the printed marking, which drastically cuts down on the clear film border—a major cause of the dreaded "silvering" effect.
Once cut, you need a way to handle that flimsy, wet decal. A good pair of fine-tipped tweezers is non-negotiable for lifting it from the water and moving it to the model. Seriously, avoid those super-sharp, pointy tweezers; they’re just asking to puncture or tear the film. A flat or rounded-tip pair is a much safer bet.
Application Brushes and Swabs
A small, soft-bristle paintbrush is what you'll use to actually position the decal. Just dip the brush in a little water and use it to gently nudge the decal off its backing paper and into its final spot. A soft brush won’t scratch the decal or your paint job.
Cotton swabs are also surprisingly useful for a couple of key tasks:
- Wicking Away Water: Once the decal is where you want it, gently roll a swab over it to absorb any excess water and setting solution from underneath. This helps it snug down.
- Applying Pressure: A damp swab is also perfect for carefully pressing the decal down, which forces out any stubborn air bubbles.
Pro Tip: Cut your cotton swabs in half. The crisp edge of the cardboard or plastic stick is perfect for gently burnishing decals into tight panel lines without damaging them.
The Magic Bullets: Decal Solutions
This is where you go from amateur to pro. Decal setting and softening solutions are what separate good results from truly great ones, especially when you're working on complex surfaces with rivets, panel lines, or sharp curves.
First up is a decal setting solution, like Micro Set. You apply this to the model's surface before the decal goes on. It acts as a wetting agent that helps the decal adhere better and prevents tiny air bubbles from getting trapped underneath. If you're looking for an all-in-one product, something like the AMMO by Mig Jimenez Ultra Decal Set & Decal Solution is fantastic for prepping the surface.
After the decal is in place, you’ll apply a decal softening solution, like Micro Sol, over the top. This stuff is powerful—it temporarily dissolves the decal film, causing it to "melt" over every little detail below. It’s the real secret to making markings look painted on. And if you ever want to create your own unique markings beyond what's in the box, you can always turn to specialized decal printing services to bring your custom designs to life.
Why Surface Preparation Is a Game Changer
A lot of modelers are quick to blame the decal when they see that ugly, frosted outline known as silvering. But the hard truth? The problem almost always lies with the surface underneath. A properly prepared surface is the single most important factor in getting that flawless, painted-on look.
Think of it this way: try sticking a piece of tape to sandpaper, then try sticking it to a smooth pane of glass. The tape on the sandpaper only grabs the high points, leaving tons of tiny air pockets in the valleys. This is exactly what happens when you apply a decal over a matte or flat paint finish. Those microscopic air pockets are what you see as silvering.
Creating the Perfect Gloss Foundation
The only real solution is to give the decal a perfectly smooth, non-porous foundation to grab onto. This means applying a gloss clear coat over the area where the decal will go. This simple step fills in the microscopic texture of the matte paint, giving the decal a perfectly flat surface to bond with and eliminating any chance for air to get trapped.
You have a few solid options for clear coats:
- Acrylic Gloss Coats: These are fantastic to work with, low on fumes, and clean up easily with water or acrylic thinner. They're a great choice, especially if you're just starting out.
- Lacquer Gloss Coats: Lacquers give you a much harder, more durable finish. The trade-off is the strong fumes and the need for lacquer thinner for cleanup, so good ventilation is an absolute must.
No matter which you choose, your application technique is what really matters. Start by applying several light mist coats, letting each one dry for a few minutes. Then, follow up with a final, slightly heavier "wet" coat to get that smooth, glass-like sheen. This approach helps prevent drips and gives you a much more even finish.
A common mistake I see is modelers only glossing the specific spot where the decal will sit. This can create a noticeable "patch" in the final finish. It's much better to gloss the entire panel or surface to ensure a uniform appearance later on.
The Final Polish Before Application
Once your gloss coat has had time to fully cure—give it at least 24-48 hours—there's one last prep step: a thorough cleaning. Even a surface that looks pristine can be hiding invisible enemies like dust, oils from your fingerprints, or sticky residue from masking tape.
Grab a soft, lint-free cloth and lightly dampen it with a bit of isopropyl alcohol to gently wipe down the area. This lifts away any contaminants that could stop the decal from adhering properly. After this quick wipe-down, your model is finally ready for decals. This careful preparation is truly the bedrock of professional-looking decal work. It's this level of precision that's now demanded by modern, ultra-thin decals, a result of printing technology advancing to meet consumer demand for personalization in markets like the automotive industry, which hit a value of USD 2.3 billion in 2023. If you ever make a mistake during this process and need to start over, our guide on how to remove paint from plastic models can be a lifesaver.
You've got a perfectly prepped, glossy surface ready to go. Now it's time to bring your model to life with markings. This is where the magic really happens—turning a painted object into a realistic replica. Applying water-slide decals is a delicate dance of patience and precision, and it goes way beyond just dipping and sliding.
First up, grab a sharp hobby knife and carefully cut the decal you need from the main sheet. You want to trim as close to the printed marking as you can without actually touching the ink. This simple step minimizes the amount of clear carrier film, which is your best defense against that dreaded "silvering" effect.
Next, you'll need a shallow dish of warm water. Temperature matters here. Lukewarm to slightly warm water helps activate the decal's adhesive way more effectively than cold water. Using a good pair of tweezers, submerge the cut-out decal completely.
Soaking and Sliding Your Decal
Now comes a crucial step where a lot of modelers, new and old, go wrong: the soaking time. This is not a one-size-fits-all deal. Older, thicker decals from kits back in the day might need a full minute, but modern, high-quality decals from brands like Cartograf might only need 15-20 seconds. If you over-soak them, the adhesive can wash right off, leaving you with a decal that refuses to stick.
Once it's soaked, I like to place the decal on a non-absorbent surface like a small ceramic tile or even the back of a spoon to rest for a moment. While it sits, dab a small amount of a decal setting solution (like Micro Set) onto the exact spot on your model where the marking will go. This preps the surface and gives the decal a slick runway to slide around on for perfect positioning.
Gently bring the decal, still on its backing paper, right up to the model. Using a soft, damp paintbrush, carefully slide the decal from the paper onto the prepared surface. Your brush is now your main tool for nudging it into its final, perfect position.
A Real-World Scenario: Let's say you're applying a long, thin "No Step" stencil onto an aircraft wing. Instead of trying to slide it off all at once and risking a curled-up mess, anchor one end with your brush. Then, slowly and gently pull the backing paper out from under the rest of the decal. This technique is a lifesaver for preventing long decals from folding over on themselves.
Once it's positioned just right, use the corner of a paper towel or a cotton swab to gently wick away the excess water and setting solution from underneath. I find that lightly rolling a swab from the center of the decal outwards is the best way to press it down flat and squeeze out any trapped air bubbles or liquid.
This infographic lays out the simple but critical workflow for prepping your model's surface before a single decal is applied.
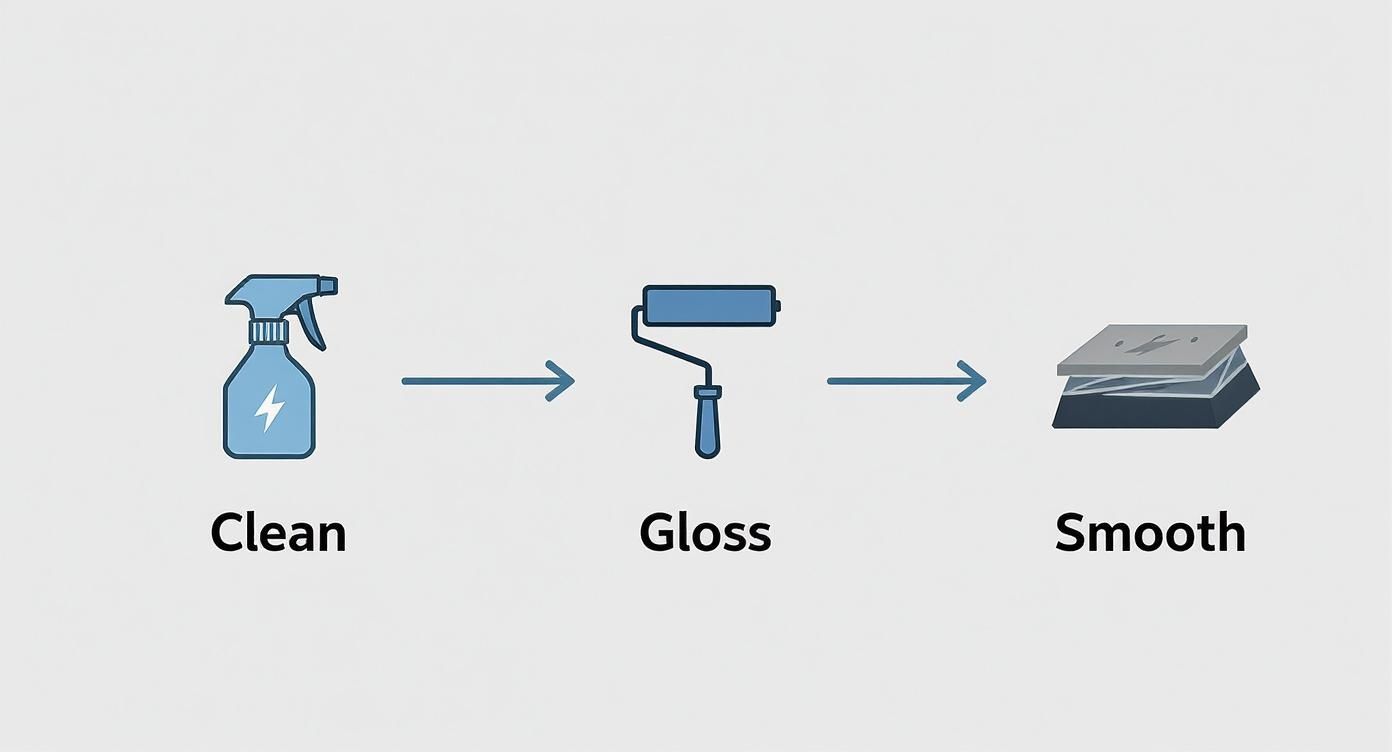
This visual process—clean, gloss, and smooth—is the non-negotiable foundation. Get this right, and your decals will adhere perfectly and look like they were painted on.
Making Decals Conform to Details
Now, what about those tricky, complex surfaces? If your decal needs to settle down over panel lines, rivets, or sharp curves, it’s time to bring out the heavy hitter: decal softening solution.
Using your soft brush, apply a light coat of a softener like Micro Sol directly over the top of the positioned decal. And then—don't touch it! The decal will wrinkle up and look like you've completely ruined it. Don't panic. This is exactly what's supposed to happen. The solution is literally melting the decal film, allowing it to "suck down" and hug every tiny detail underneath.
Here’s what you can expect from the process:
- Initial Application: The decal will wrinkle and shrivel up almost immediately. Resist the urge to fix it.
- Patience is Key: Let it air dry completely without any interference. This can take anywhere from a few minutes to an hour, depending on humidity.
- Second Pass (If Needed): For really stubborn areas or very deep panel lines, a second, light application might be necessary once the first coat is fully dry.
After it dries, the decal will be perfectly smooth and look as though it were painted on. This one step is what separates a good model from a great one, creating that seamless, professional finish we're all after.
Handling Dry-Transfer and Sticker-Style Decals
While water-slide decals are the bread and butter of most modern kits, you're bound to run into dry-transfer or classic peel-and-stick markings, especially in older or more specialized models. Each one demands a totally different approach, but getting them right is a skill every well-rounded modeler should have in their back pocket.
This isn't just a niche corner of the hobby, either. The market for various decal papers was valued at a whopping USD 650 million in 2024 and is on the rise, partly because new tech is making these materials much friendlier for hobbyists.
Mastering Dry-Transfer Decals
Dry-transfer decals, which you might know as "rub-ons," deliver unbelievably sharp results. Because they have zero carrier film, the dreaded silvering effect is completely off the table. The catch? You only get one shot. Once a dry-transfer decal touches the surface, there’s no going back.
The whole game is about the burnishing process. Start by carefully cutting out the marking, but leave a little extra clear sheet around the edges to give yourself a place to hold it. Get it positioned exactly where you want it on your model, then use a small piece of tape to secure one edge. This creates a hinge and stops it from wiggling around while you work.
Now, grab a burnishing tool, a rounded toothpick, or even the blunt end of a paintbrush handle and start rubbing over the decal. Use firm, even pressure and work your way from the center out. You'll often see the color of the marking change slightly as it releases from the carrier sheet and bonds to the model.
Crucial Tip: Don't just rip the sheet off when you think you're done. Gently lift one corner to peek underneath. If you see any part of the decal still clinging to the sheet, just lay it back down flat and burnish that specific spot again. A little patience here is the difference between a perfect marking and a cracked, ruined one.
The Secret to Perfect Sticker Placement
Let's be honest, peel-and-stick decals get a bad rap. They're often thick, and their aggressive adhesive can feel like a high-stakes, all-or-nothing affair. But there's a game-changing trick that turns this stressful process into one you can actually control.
The secret weapon is a simple mix of water with a single drop of dish soap. After you peel the sticker off its backing, just dab a little of this soapy water onto the model's surface and the sticky side of the decal. This temporarily neutralizes the glue, letting you slide the sticker around just like a water-slide until its position is absolutely perfect.
Once you have it exactly where you want it, use a cotton swab or a soft cloth to gently squeegee the water out from underneath. As the water evaporates, the adhesive kicks back in at full strength, locking the decal down for good. This method totally eliminates the usual pressure of applying stickers. For more tips on wrangling adhesive markings, especially larger ones, this comprehensive guide to custom vinyl wall stickers and furniture wraps has some excellent related insights.
How to Seal Decals for a Uniform Finish
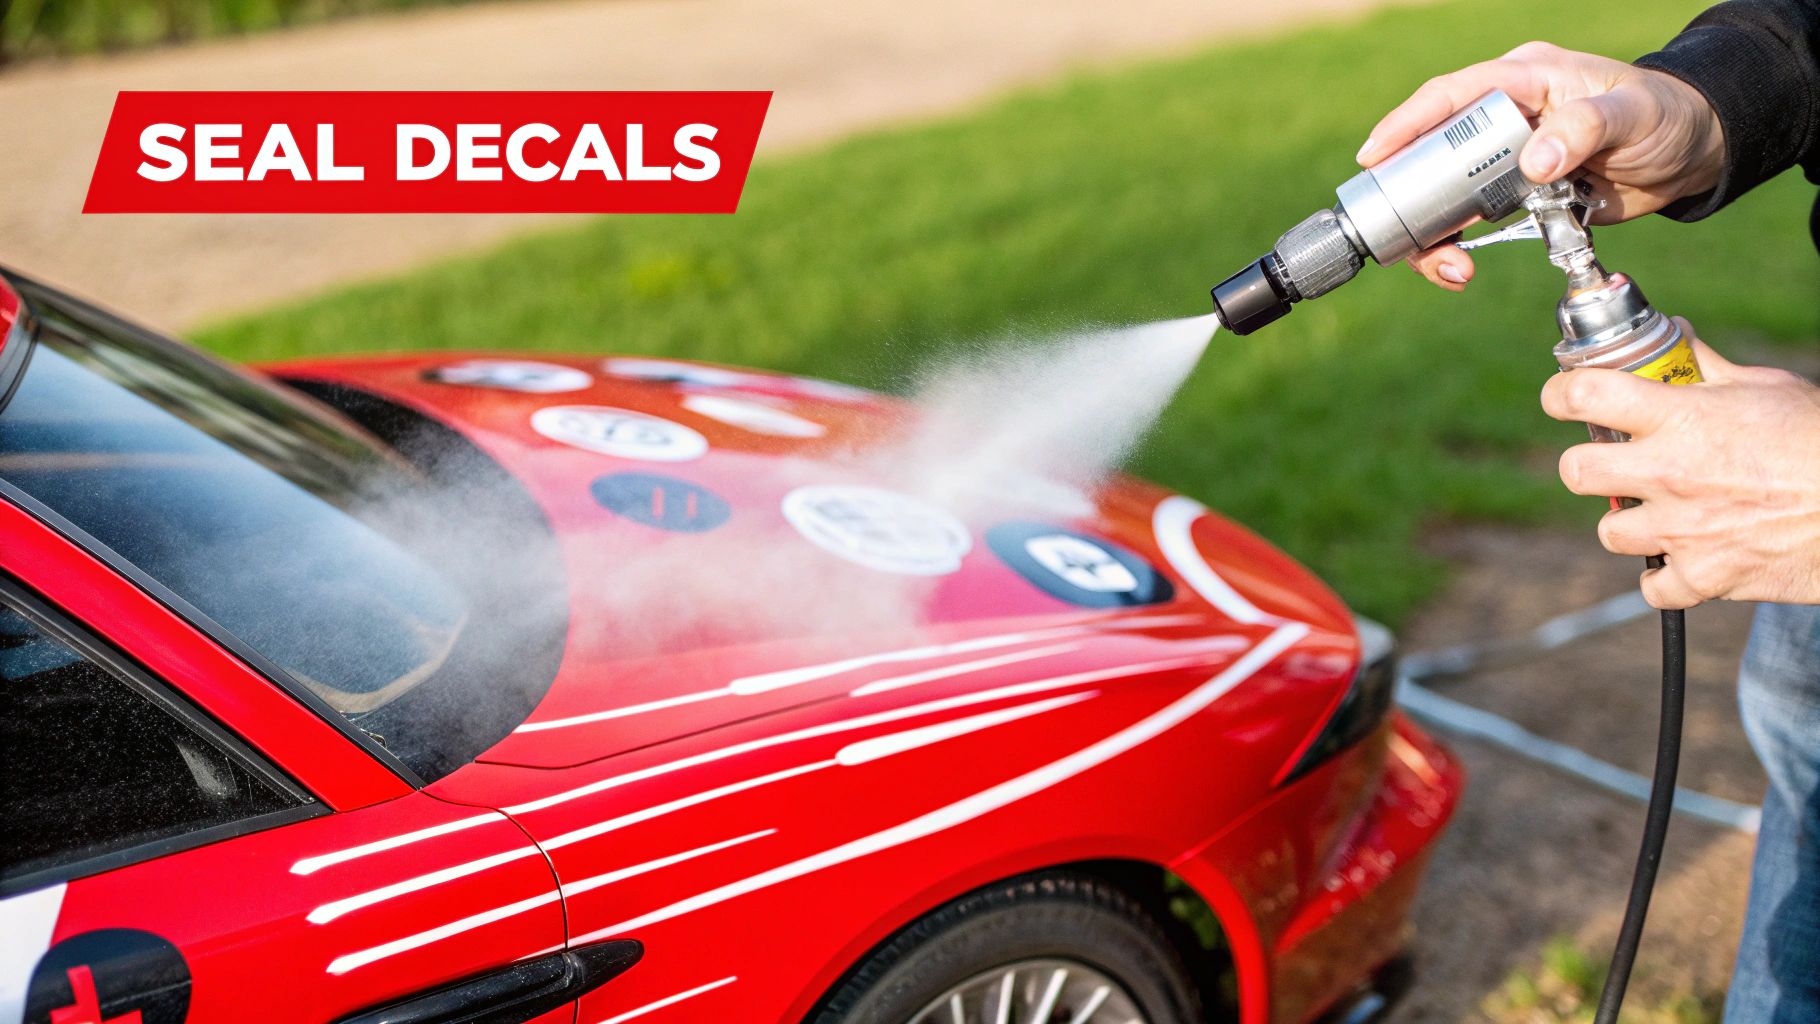
Alright, your decals are down, they're perfectly set, and they look razor-sharp against that gloss coat. It feels like you're at the finish line, but one of the most crucial protective steps is still ahead. Sealing your decals is what locks in all that painstaking work, protecting it from handling, dust, and the slow fade of time.
This final clear coat is what truly melts the markings into the model, making them look like they were painted on from the start.
Without this protective layer, you're leaving your decals vulnerable. Edges can start to lift over time, and the thin ink is an easy target for scratches. The final varnish doesn't just add durability; it's the key to completely hiding the faint outline of the decal film, which is how you get that ultimate, seamless appearance.
Applying the Sealing Coat
The secret to sealing decals without ruining them is to start with a light touch. It doesn't matter if you're using a rattle can or an airbrush—your first pass needs to be a very light mist coat.
Hold your airbrush or can a bit further away from the model than you normally would. Apply a fine, almost-dry layer right over the decals.
Let that mist coat flash off for about 10-15 minutes. Think of it as a protective barrier that shields the delicate decal ink from the stronger solvents in the heavier coats to come. Once that initial layer has set, you can go back and apply two or three progressively wetter coats to build up a smooth, solid finish.
Choosing the Right Sheen for Your Model
The final sheen you choose is more than just a clear coat; it's an artistic decision that breathes life into your project. Whether you go with gloss, satin, or matte should be driven by the real-world subject you're trying to replicate. Each finish tells a different story.
- Gloss Finish: This is for anything that’s meant to shine. Think of a classic Ferrari, a brand-new airliner, or a highly polished show car. A high-quality varnish like AK Interactive Gloss Acrylic Varnish will give you that deep, wet-look shine.
- Satin Finish: This semi-gloss look has a slight sheen and is incredibly versatile. It's the perfect choice for modern jets that often have a subtle luster, as well as many civilian cars and even sci-fi subjects. It just looks "right" in a lot of situations.
- Matte Finish: A completely flat, non-reflective finish is the standard for most military vehicles. A battle-hardened tank or a low-visibility tactical aircraft should absorb light, not reflect it. This is easily the most common and essential finish for military modelers.
By selecting the right final coat, you’re doing more than just protecting the decals—you're setting the final tone for the entire build. This last step is what harmonizes the paint, weathering, and markings into one cohesive, believable piece, ensuring your model looks authentic from every single angle.
Troubleshooting Common Decal Problems
No matter how meticulous you are, every modeler eventually runs into a decal disaster. That stubborn air bubble, a dreaded wrinkle, or a decal that folds over on itself can feel like a major setback. The good news is that most of these headaches are entirely fixable with a little patience and the right technique. Learning how to apply decals is just as much about recovery as it is about perfection.
The most common gremlin we all face is silvering—that tell-tale milky sheen under the decal film. If you see this after a decal has dried, it means air is trapped between the decal and a rough, matte surface. The best fix is always prevention (a gloss coat is your best friend here!), but you can often save it by carefully piercing the decal with a fresh blade and applying more softening solution to help it settle down.
Fixing Wrinkles and Trapped Air
Even after you've carefully squeegeed a decal, you might come back later to find a tiny wrinkle or an air bubble that just won't go away. Whatever you do, don't try to force it down while it's still wet; you'll almost certainly tear the delicate film. Instead, just let the decal dry completely.
Once it's dry, grab the sharpest hobby knife you own and gently prick the center of the bubble. If it's a wrinkle, make a tiny slice right along the crest. Next, apply a small drop of decal softening solution directly onto the blemish.
- The Prick Method: Poking a tiny hole gives the trapped air or water a place to escape.
- Applying Softener: The solution re-melts the decal film, allowing it to relax and settle down into the new opening you just created.
- Gentle Pressure: Give it a few moments to work its magic, then use a damp cotton swab to carefully press the area flat.
This little trick works wonders. More often than not, it makes bubbles and wrinkles vanish completely, leaving a smooth, painted-on finish.
Rescuing Damaged or Folded Decals
A folded or torn decal is enough to make any modeler's heart skip a beat. If a decal folds over on itself while you're moving it into place, immediately flood the area with water and add a little decal setting solution. Using two soft brushes, you can usually tease it back open without causing a tear.
But what if it does tear? Don't panic. Slide the decal into its final position and align the torn edges as perfectly as you can. You'd be surprised how often a small tear becomes virtually invisible once the decal settles down and you seal everything with a final clear coat.
The technology behind our hobby decals is always getting better, and a lot of that innovation comes from surprising places. For instance, the tableware ceramic decal market—which is expected to hit USD 1.73 billion by 2025—is constantly pushing for more flexible decals that can conform to complex curves. That's a huge benefit for modelers working on fuselages and turrets. You can learn more about how this industry drives hobby innovation by exploring research on the ceramic decal market.
With these recovery techniques in your back pocket, you can tackle any decal job with confidence, knowing you have a solution for just about any problem that comes your way.
At Fusion Scale Hobbies, we carry all the essential tools and solutions from top brands like Microscale, Tamiya, and AK Interactive to ensure your decal work is flawless from start to finish. Explore our massive selection of modeling supplies at https://fusionscalehobbies.com and get everything you need for your next project.