


Before you can start twisting wires and gluing on foliage, you need to get your workshop in order. Building a convincing model tree is all about having the right armature wire, foliage, adhesives, and texturing materials ready before you start. A little prep work now saves you from those frustrating mid-project hunts for glue or the right paint, letting the whole process flow smoothly.
Gathering Your Essential Tree-Making Toolkit
Let's be honest: creating realistic model trees is less about being a gifted artist and more about having the right stuff on your workbench. Nothing kills the creative buzz faster than realizing you’re out of spray adhesive or the one shade of green you desperately need. Think of it like a chef getting their mise en place ready—everything is sorted and within reach before the cooking begins. When you gather your toolkit first, you're setting yourself up for a good, productive modeling session.
This isn't just a shopping list. I'll get into why certain materials are better for specific jobs. It's the small details that make the difference between a tree that just "looks okay" and one that fools the eye.
The Core Structure: Armatures and Adhesives
Every tree starts with a skeleton. This armature is the frame that dictates the tree’s final shape and size. For most of the deciduous trees you'll be building, good old floral wire is your best friend.
- Floral Wire: I recommend keeping a few gauges on hand, somewhere between 20 and 26. The thinner wire is perfect for those delicate, spindly branches at the top, while the thicker stuff gives you a solid, sturdy trunk. Using different sizes lets you create that natural taper from the main trunk all the way out to the tiniest twigs.
- Adhesives: You’ll want a small arsenal of glues. A quality PVA glue (wood glue works great) is a must-have for coating the trunk and building up bark texture. A spray adhesive is practically a requirement for applying foliage without losing your mind, and a can of scenic cement or a final sealing spray is crucial for locking everything down when you're done.
Getting these structural bits sorted out first ensures your tree has a strong, believable foundation before you even think about bark or leaves.
Here’s a quick-glance table of the core materials you’ll want to have on hand. It breaks down what each item does and offers a few practical tips from my own experience building hundreds of trees.
Essential Materials for Building Model Trees
| Material | Primary Use | Recommended Types & Tips |
|---|---|---|
| Floral Wire | Creating the tree's armature (trunk & branches) | Gauges 20-26 offer the best versatility. Use thicker wire for the trunk and thinner wire for the upper branches to create a natural taper. |
| PVA Glue | Sealing the wire, building bark texture, general bonding | A good wood glue is perfect. It's strong, sandable, and takes paint well. Mix with fine sand for extra grit on older trees. |
| Spray Adhesive | Attaching foliage to branches quickly and evenly | 3M Super 77 is a classic choice. Work in a well-ventilated area and spray from a distance to avoid clumping. |
| Wood Filler/Modeling Paste | Creating thick, realistic bark texture | Great for species like oaks or maples. Apply it with a sculpting tool or an old brush, then scribe lines into it before it dries. |
| Clump Foliage | Forming the main leafy canopy and adding bulk | Brands like Woodland Scenics or Noch offer a huge variety. Use multiple shades of green on a single tree to create depth. |
| Fine Turf/Scatter | Adding color variation and fine leaf detail | Sprinkle this over the clump foliage after applying spray adhesive. It adds another layer of realism and breaks up uniform colors. |
| Acrylic Paints | Painting the trunk and branches, weathering effects | Grab a selection of browns, grays, and dark greens. A black or brown wash is essential for creating shadows in the bark. |
| Matte Finishing Spray | Sealing the final model and removing shine | Products like Testors Dullcote are industry standards. A matte finish is non-negotiable for realism—shiny trees just look like plastic. |
With these items in your toolkit, you're well-equipped to tackle nearly any type of tree, from a simple background filler to a centerpiece hero tree.
Bringing Your Tree to Life: Texture and Foliage
With the armature shaped, it's time for the fun part: making a wire frame actually look like a tree. This is where you add the details that bring it to life.
The secret to a realistic tree isn't just one material; it's how you layer several different ones. Stacking textures and blending colors is what mimics the beautiful imperfections you see in nature. That’s always the end goal.
To pull this off, you need materials for both the bark and the leaves.
- Bark Texture: For that rough, deeply grooved look of an old oak, you can’t beat wood filler or a thick modeling paste. If you’re modeling a tree with smoother bark, like a birch or aspen, a simple mix of PVA glue and a bit of tissue paper works surprisingly well.
- Foliage: You have a ton of options here. Clump foliage is great for creating the basic bulk and shape of the canopy. Fine turf or scatter materials, in a mix of greens and even some browns, add fantastic color variation and a more delicate look. For an even more detailed look, you can find a breakdown of supplies in our complete diorama supplies guide, which covers many materials that cross over into tree-making.
The Finishing Touches: Paint and Tools
Finally, your toolkit needs the items that will pull the entire project together. The right paint job adds incredible depth and weathering, and a few simple tools will make every step of the process much easier and more precise.
You’ll want a handful of acrylic craft paints in earthy tones—think various browns, grays, and a few dark greens. A black or dark brown wash is a game-changer for sinking into the bark texture and creating shadows, while a light tan or gray is perfect for dry brushing some highlights onto the raised areas. And don’t forget a can of matte finishing spray to kill any unnatural shine from the paint or glue.
As for tools, the list is pretty straightforward but absolutely essential:
- Wire cutters
- Pliers (for twisting the wire trunk)
- An assortment of old, cheap paintbrushes
- A small cup or palette for mixing glue or paint
- Tweezers for placing small bits of foliage or details
Once you've assembled these items, you're officially ready to start building a stunningly realistic forest for your layout or diorama.
Building the Tree Armature: Your Model's Foundation
The armature is the unsung hero of every convincing model tree. It's the hidden skeleton that provides the shape, strength, and unique character you’re trying to capture. A flimsy, poorly shaped armature will doom your tree from the start, no matter how good your foliage is. Get the armature right, though, and you've built a natural-looking foundation that makes every other step easier and more effective.
For most modelers, the best and most versatile way to create this foundation is by twisting wire. It gives you total control over the trunk's taper, the spread of the canopy, and all the subtle imperfections that sell the illusion of a real tree.
This quick overview shows how a raw armature evolves into a finished model.

As you can see, everything starts with the armature. It dictates the form that all your texturing and foliage work will follow.
Mastering the Twisted Wire Technique
The core idea here is simple. You bundle several strands of floral wire, twist them tightly to form a trunk, and then peel away smaller bundles to create the main branches. From there, you just keep subdividing those branches into even smaller twigs until you have a delicate, realistic structure.
Here’s my approach for getting the best results:
- Cut Your Wires: Start by cutting a bundle of wires—anywhere from 10 to 30 strands, depending on how beefy you want the trunk to be. Cut them all to the same length, roughly twice as long as your final tree height.
- Form the Trunk: Find the midpoint of your wire bundle and start twisting. A hand drill or a good pair of pliers makes it much easier to get a uniform, tight twist that forms the main trunk.
- Create Main Branches: Stop twisting about a third of the way up. Now, split the remaining untwisted wires into two or three smaller groups. Twist each of these to form the primary branches coming off the trunk.
- Develop Secondary Branches: Keep repeating that process. Take each main branch, split its wires into even smaller bundles, and twist them to create the next level of branches. This is how you build that natural, almost chaotic branching pattern.
A classic mistake is making branches too symmetrical. Nature is random. Don't be afraid to bend your branches, make some longer than others, and avoid creating a perfect "Y" shape at every split. It's those little imperfections that make a miniature tree truly believable.
Capturing Natural Taper and Form
A real tree's trunk is always thickest at the base and gradually gets thinner toward the top. Your wire armature has to do the same. To achieve a more dramatic taper for a big oak or maple, I like to add shorter lengths of wire into the main bundle right at the base before I start twisting. These extra wires bulk up the lower trunk but don't extend into the upper branches, creating a very convincing, natural taper.
If you really want to get the foundational shape right, it can be surprisingly helpful to look at techniques for pruning real bonsai trees to achieve desired forms and structures. Understanding how real trees are shaped by nature—and by hand—will absolutely inform the artistic choices you make with your wire.
Alternative Armature Methods
While twisted wire is my go-to technique for most deciduous trees, it’s definitely not the only game in town. Sometimes, Mother Nature provides the best starting point.
- Dried Plant Roots: For smaller scales or trees with extremely fine, gnarled branches, the root systems of certain dried plants (like sagebrush or sedum) are perfect. They offer an incredible level of detail right out of the box. You just need to trim them to shape and make sure they are completely dried out and preserved.
- Sculpted Foam: If you're modeling a massive, ancient tree with a uniquely thick or even hollowed-out trunk, wire just isn't practical. Instead, you can carve the basic trunk shape from extruded polystyrene foam—that dense pink or blue insulation board. This lets you sculpt a truly unique base, and you can then just drill holes to insert wire branches for the canopy.
Ultimately, the goal is to mimic the growth patterns of the specific tree you're modeling. Take a minute to look at photos of real trees. Notice how branches reach for light, how trunks thicken with age, and how the overall silhouette is rarely perfect. Bringing those observations to your workbench is what will elevate your models from simple representations to miniature works of art.
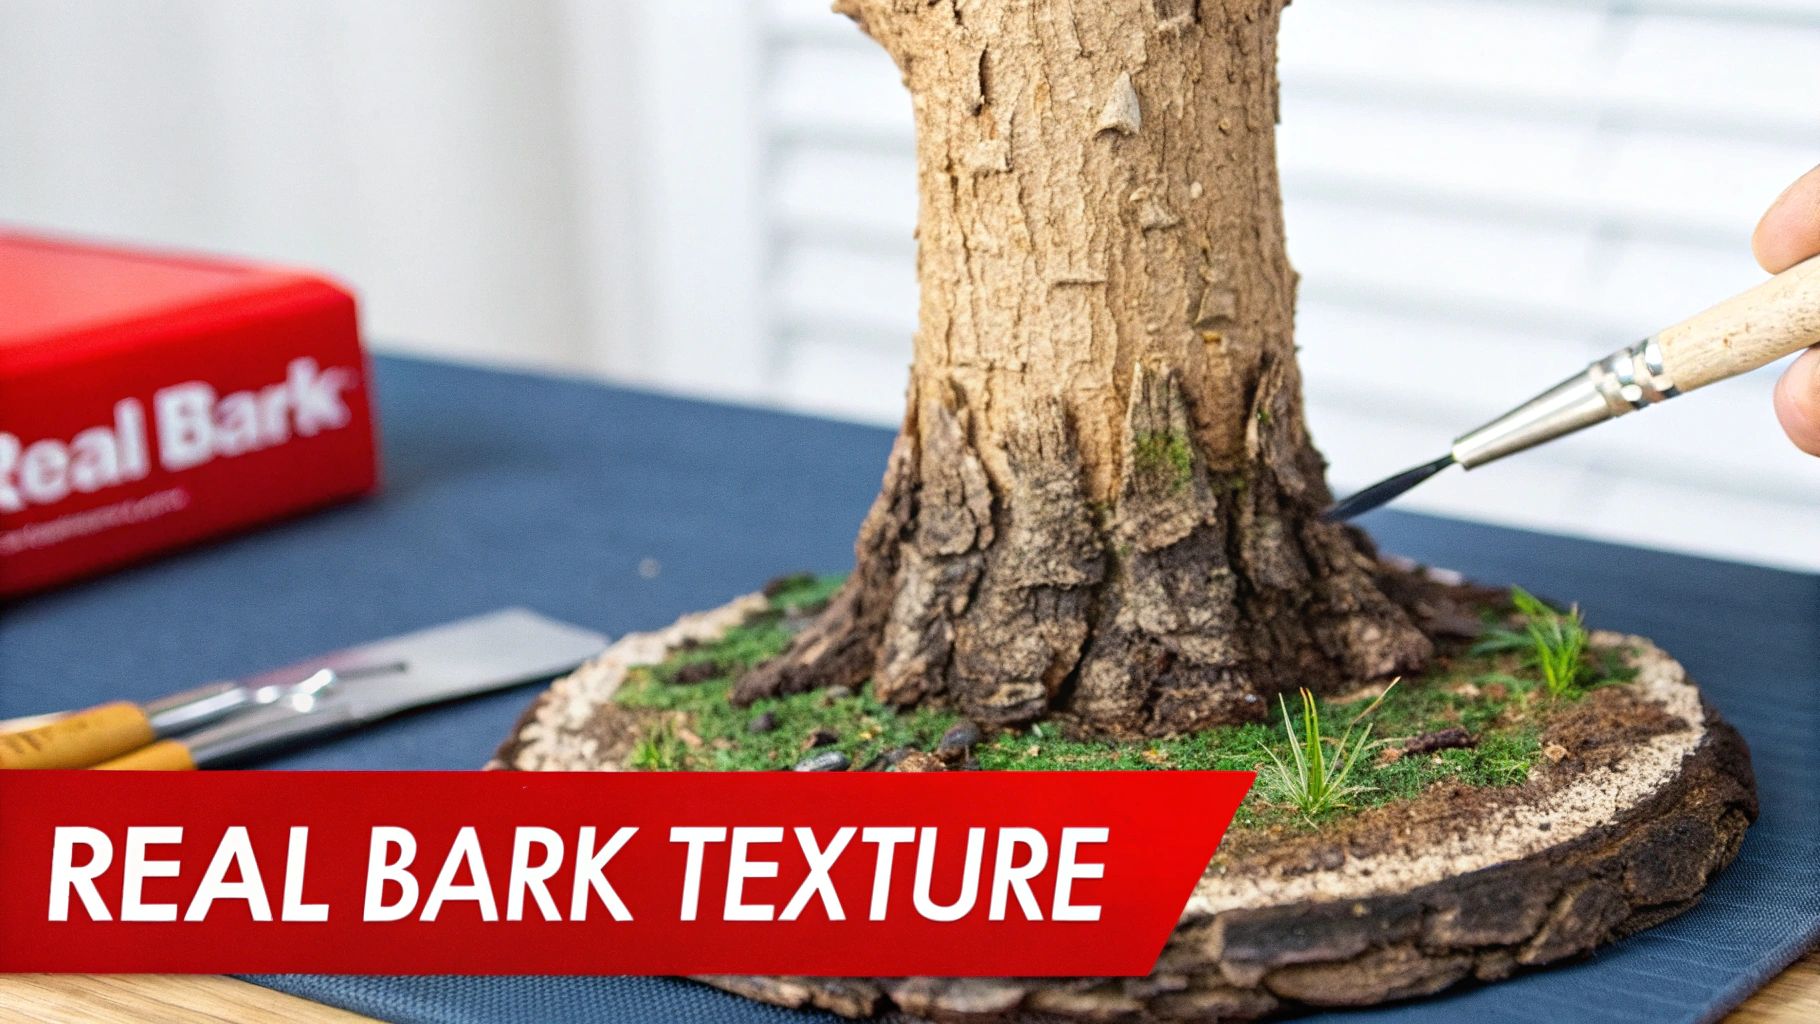
Creating Lifelike Bark Textures and Colors
A bare wire armature holds the shape of a tree, but the magic really happens when you add the bark. This is the step that breathes life into the frame, transforming a simple wire skeleton into something organic and believable. A smooth trunk just screams "fake," so adding a convincing surface texture is non-negotiable if you want a model tree that truly fools the eye.
The method you choose for texturing will depend entirely on the type of tree you’re trying to model. A gnarled, ancient oak requires a completely different approach than a slender, smooth-barked birch. Luckily, simple materials from your local hardware or craft store are all you need to replicate these varied surfaces.
Sculpting Bark with Wood Filler or Modeling Paste
For trees with thick, deeply grooved bark—think oaks, maples, or old pines—nothing beats a good quality wood filler or acrylic modeling paste. These materials are thick, easy to sculpt, and dry rock-hard, creating a durable and highly realistic surface.
My go-to method is to apply the filler directly over the sealed wire armature with an old, stiff brush or a small spatula. Don't worry about being neat; an uneven application adds to that natural, weathered look. While the paste is still wet, I'll use a dental pick, a sculpting tool, or even the tip of a paperclip to scribe vertical lines into the trunk, mimicking the deep fissures of real bark.
Let the filler cure completely. Depending on how thick you laid it on, this can take anywhere from a few hours to a full day. Once it's dry, you have the perfect canvas for painting.
Simulating Finer Textures
Not all trees have rugged bark. Younger saplings or species like aspen and birch have much smoother, finer textures. For these, slathering on thick wood filler would be total overkill and look completely out of scale.
A classic and highly effective technique for this involves nothing more than simple PVA glue and tissue paper.
- Tear the tissue into small, irregular strips. Don't cut it—you want those feathered edges.
- Coat a section of the trunk with a layer of PVA glue.
- Wrap the tissue strips around the glue-covered trunk, using a wet brush to gently press them down and smooth out any harsh edges.
The wet glue saturates the tissue, allowing it to conform to the armature and create subtle wrinkles and textures that perfectly replicate smooth bark. This method is incredibly versatile and cheap, making it a fantastic skill to add to your scenery-making arsenal.
Painting for Depth and Realism
With your texture applied and fully cured, it’s time to paint. The goal here isn't just to add color but to create the illusion of depth by emphasizing the shadows and highlights you sculpted into the bark.
Start with a solid base coat. For most trees, this will be a dark brown, a cool gray, or a tan, depending on the species. It’s worth exploring our guide on the differences between acrylic and enamel model paints to see which type best suits your workflow. Personally, I prefer acrylics for their fast drying time and easy cleanup.
Once the base coat is dry, the real artistry begins with two simple but powerful techniques.
Washes and dry brushing are the cornerstones of realistic miniature painting. A dark wash sinks into the crevices to create shadows, while a light dry brush catches the raised edges to create highlights. Mastering these two steps will elevate your model trees from good to great.
To create a wash, just thin down black or dark brown paint with water until it has the consistency of ink. Brush this watery mix over the entire trunk, letting it pool in all the grooves and cracks you created. After a minute or so, you can use a paper towel to gently dab away the excess from the raised surfaces.
After the wash is completely dry, you’ll apply the highlights using a technique called dry brushing. Grab a lighter color—like a tan or light gray—and get a tiny amount on a flat brush. Vigorously wipe most of the paint off onto a paper towel until the brush seems almost dry. Then, lightly drag the brush across the trunk. The remaining pigment will only catch on the raised details of the bark, making the texture pop.
Applying Foliage for a Realistic Canopy
With a beautifully textured and painted armature, your wire frame finally looks like a tree. Now for the best part—adding the foliage. This is where the model truly comes alive, transforming from a miniature sculpture into a vibrant, living piece of your scenery. A well-made canopy is what separates a convincing model from something that looks like a toy.
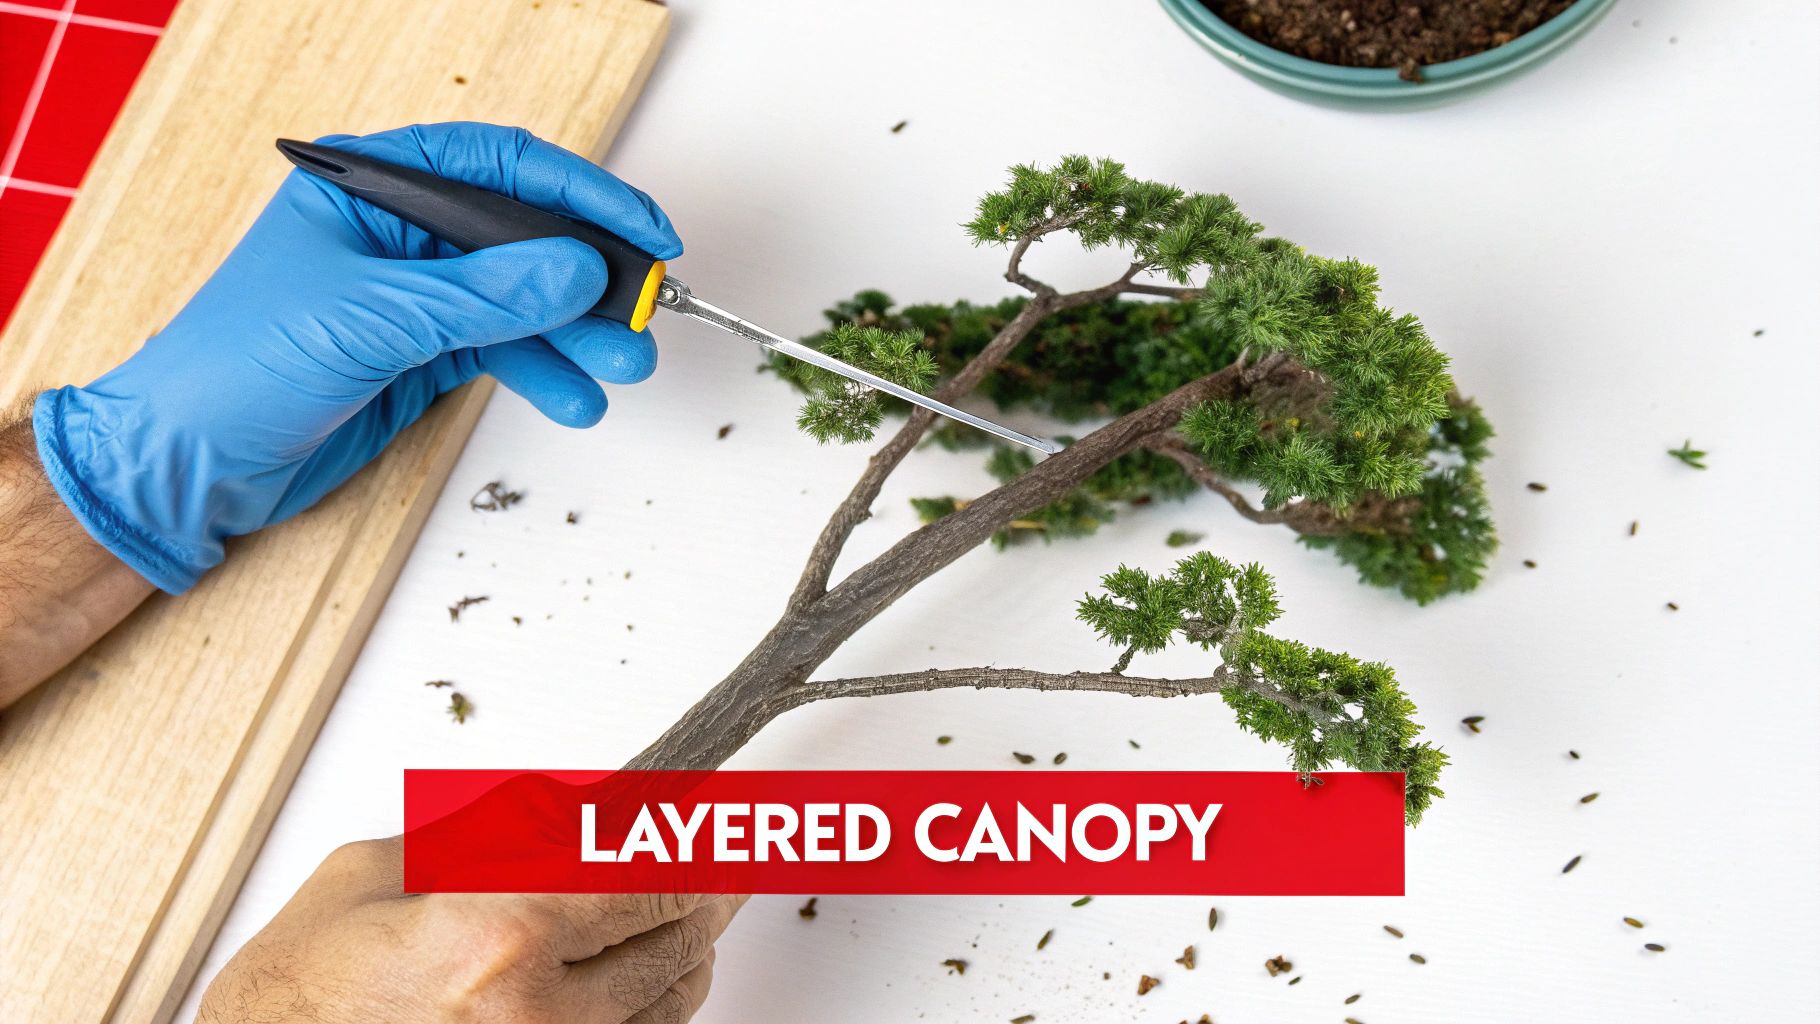
The secret isn’t just dumping a single color of green flock onto some glue. Realism comes from layering different materials, varying the color, and building a canopy with believable density and texture. Let’s break down the most effective ways to get a full, natural-looking result.
Choosing Your Foliage Materials
The type of foliage you choose will have the biggest impact on the final look. Each material offers a different texture and works better for certain scales, so it pays to know what your options are and what they do best.
Here’s a look at the most common materials and how to apply them.
Foliage Options and Application Methods
This table breaks down the go-to materials for creating realistic trees. Each has its strengths, so don't be afraid to mix and match them on a single model to get the best of all worlds.
| Foliage Type | Best For | Application Method | Realism Level |
|---|---|---|---|
| Clump Foliage | Creating the main leafy masses and bulk of a deciduous canopy. | Tear into small pieces, apply spray adhesive to branches, and press on. | Good |
| Poly-Fiber & Scatter | Building an incredibly fine and airy branch structure for highly detailed trees. | Stretch fiber thinly over branches, spray with adhesive, then sprinkle with scatter. | Excellent |
| Fine Turf & Scatter | Adding color variation, highlights, and delicate leaf texture over a base. | Sprinkle over a layer of spray adhesive or wet scenic cement. | Good to Excellent |
| Static Grass | Simulating pine needles on conifers or very fine textures on certain trees. | Apply with a static grass applicator over glued branches. 2mm is best. | Excellent |
Ultimately, the most convincing trees almost always use a blend of these materials. I like to start with clump foliage or a poly-fiber web for the base structure, then build up layers of fine turf in multiple colors on top. This layering is what creates that essential visual depth.
The Layering Method for Deciduous Trees
Creating a canopy for a tree like an oak or maple is all about building up layers. If you just slap material on haphazardly, it’s going to look lumpy and unnatural. A systematic, layered process, however, will give you a canopy with depth, color variation, and a realistic silhouette.
First, I like to give the bare branches a quick, light misting of a dark brown or gray spray paint. This little step ensures that if any small gaps show through the final foliage, they look like shadowed branches, not shiny wire.
Next, grab a good spray adhesive, like 3M Super 77. Work in a well-ventilated area and hold the can about 8-10 inches away, spraying in short bursts. You want even coverage, not thick, wet globs.
Now you can start applying your base. If you're using clump foliage, tear it into small, irregular pieces and gently press it onto the sticky branches. For the poly-fiber method, stretch a very thin layer over the branches first, hit it with another light coat of adhesive, and then add your fine turf.
For modelers seeking the ultimate in scale-accurate leaves, especially for close-up dioramas, you can take things a step further. Tools like the AMMO by Mig Jimenez 1/35 Leaf Maker let you punch out individual leaves from real dried leaves or colored paper. It’s definitely time-consuming, but attaching these one by one with tweezers and PVA glue provides a level of realism that is simply unmatched.
Adding Color Variation and Sealing Your Work
A tree with a single, uniform green canopy will always look artificial. Nature is a symphony of slightly different hues. The easiest way to replicate this is to use at least three different shades of fine turf or scatter.
After your base foliage is in place, lightly mist the top surfaces of the canopy with adhesive again. Start by sprinkling your mid-tone green over most of the tree. Then, use a lighter, more vibrant green just on the highest branches—the ones that would catch the most sunlight. Finally, add a darker green or even a touch of brown turf to the undersides of the leafy clumps to simulate shadows.
This simple color modulation technique instantly adds a huge amount of depth. Once you're completely happy with how it looks, the final step is to lock everything in place for good.
Mist the entire tree from above with scenic cement or a 1:3 mix of PVA glue and water with a drop of dish soap. Let it dry completely. For an ultra-durable finish that will protect your hard work from humidity and handling, you can’t beat a final light coat of a matte varnish like Testors Dullcote.
Modeling Conifers and Other Unique Tree Species
While a layout full of leafy deciduous trees is a solid foundation, a truly convincing scene needs variety. That's where conifers like pines and firs, or even unique species like weeping willows, come into play. They introduce entirely new shapes and textures that break up the visual repetition.
Making these types of trees requires a slight shift in your technique, but the results add incredible depth and character to your layout. The basic process—building an armature and adding foliage—is still the same. The real difference lies in how you shape that armature and the materials you choose. A pine’s iconic conical shape and needle-like texture just can't be replicated with the same methods you'd use for a big, rounded oak.
Shaping the Conifer Armature
The secret to a great-looking conifer is getting the structure right from the start. Unlike the wide, spreading branches of a maple, most pines and firs have a single, dominant central trunk. The branches tend to sweep slightly upward from the trunk and get shorter and shorter as they go up.
To capture this look, begin your twisted wire armature as you normally would, but make sure to leave one long, straight wire sticking up from the very top. This will be your leader, the highest point of the tree.
- Create upward-sweeping branches: Instead of just fanning your wire branches out, give each one a gentle upward curve right where it meets the trunk before letting it level out.
- Establish a conical form: This is crucial. Make sure your lowest branches are the longest. As you work your way up the trunk, each new layer of branches should be a little shorter than the one below it. This gradual tapering creates that classic "Christmas tree" silhouette.
- Keep it sparse: Real conifer branches are often more spaced out than those on deciduous trees. Avoid packing them too closely together. Leaving visible gaps gives the tree a more layered, natural appearance.
A well-shaped armature is half the battle. It provides the perfect framework that will guide your foliage application and ensure the final tree has an authentic silhouette.
The most common mistake people make with model pines is making them too dense and perfectly uniform. Real conifers have gaps and irregularities. Focus on that layered, tapered structure, and the realism will follow.
Simulating Pine Needles and Conifer Foliage
You simply can't get the look of pine needles with standard clump foliage. It's too soft and round. You need materials that offer a finer, more bristly texture. Luckily, there are a couple of excellent ways to get the job done.
One popular method uses coarse turf on a fibrous base. You can tease apart some horsehair or even furnace filter fiber, hit it with spray adhesive, and then coat it thoroughly with dark green coarse turf. Once dry, these little bristly clusters can be glued directly onto the branches.
For even better, finer detail, nothing beats static grass.
- First, paint your wire branches with a mix of brown or dark green paint and PVA glue.
- While the glue is still wet, grab your static grass applicator. Load it up with 2mm static grass fibers in a dark green or a blended forest green color.
- Apply the fibers so they stand up straight out from the branches. This creates a perfect, fine, needle-like texture that's hard to beat.
- After everything is dry, you can go back in and add some lighter green highlights or even a light dusting of snow effects for a winter scene.
This approach gives you a level of detail that looks fantastic in just about any scale.
Modeling Other Distinctive Trees
These principles of custom armatures and unique foliage apply to any tree species you can imagine. Want a weeping willow? You’ll need to create long, drooping branches from fine, flexible wire and apply foliage that hangs down naturally. Thinking about an ancient, gnarled oak? You could build it over a sculpted foam armature to get that massive, thick trunk just right.
For some truly out-of-the-box inspiration, you can even look at artistic interpretations like a rose quartz gemstone tree to spark ideas for unconventional shapes. By really looking at the core structure of a real tree, you can adapt your techniques to model almost any species, bringing true botanical diversity to your miniature world.
Common Questions About Making Model Trees
As you get deeper into making your own trees, you're bound to run into a few snags. It happens to all of us. Whether it's foliage that won't stick or figuring out which scale to even start with, these are the common hurdles every modeler faces. Let's tackle some of the most frequent questions we hear from folks in the hobby.
What Is the Best Scale to Start With?
Honestly, this is less about a "right" answer and more about what you're comfortable with. A larger scale like O (1:48) can feel a bit more forgiving when you're just starting out. The parts are bigger, making the wire twisting and foliage handling a little easier on the hands and eyes.
That said, most people model in HO (1:87), and there's a good reason for it—it hits that sweet spot between being large enough to work on and small enough to build a detailed scene.
My best advice? Just build for the scale you're already working in. The core techniques are the same no matter the size. You'll just find that smaller scales demand a bit more patience and finer materials, like swapping coarse turf for 2mm static grass. Don't let the scale intimidate you; just dive in and have fun with it.
How Can I Prevent Foliage from Falling Off?
Ah, the classic problem of "tree baldness." This is probably the number one frustration for new tree-makers. The secret isn't a single magic glue but a layered approach to adhesives. A solid sealing process is what separates a fragile model from one that will last for years on your layout.
Here’s a simple workflow for a rock-solid finish:
- The Initial Grab: Start with a quality spray adhesive to get the bulk of your foliage on, whether you're using clump foliage or fine turf over poly-fiber. This is your foundation.
- The Locking Coat: Once that first layer is on, gently mist the whole tree with scenic cement or a thinned-down mix of PVA glue and water. A 1:3 ratio of glue to water is a great starting point. This soaks into the material and really locks it down.
- The Final Seal: For a truly bomb-proof finish that also kills any artificial shine, a light coat of matte varnish is the professional's choice. In a pinch, a quick mist of unscented, extra-hold hairspray works surprisingly well, too.
The key is to let each layer dry completely before you add the next. A little patience here goes a long way.
Is It a Good Idea to Use Real Twigs?
Absolutely! Using natural armatures from dried twigs, weeds, or plant roots (like sagebrush) can give you incredibly realistic shapes with almost no effort. Nature has already done the hard work of creating a believable form.
The most critical step with natural materials is preservation. You have to make sure the twig is completely dry and free of any moisture, mold, or pests before it ever touches your scenery.
A great way to prep a natural twig is to bake it in an oven on low heat—around 200°F (95°C)—for an hour or so. This kills any creepy crawlies and gets rid of that last bit of moisture. After it’s cooled down completely, give it a good coat of matte primer to seal the wood before you start painting.
How Do I Make My Trees Look Less Uniform?
Nature is messy and beautifully imperfect, and your model scenery should reflect that. The biggest giveaway of a beginner's layout is trees that are all perfectly symmetrical and evenly spaced.
When you're twisting up a wire armature, throw in some intentional bends and random twists in the trunk and branches. No tree in the real world grows perfectly straight.
Then, when you're applying foliage, vary the density. Leave some areas thick and lush, while others can be sparse enough to let the branch structure show through. But the single most effective trick? Mix two or three slightly different shades of green flock together before you apply it. This subtle color variation instantly breaks up that toy-like, monochrome look and adds a massive dose of realism to your entire scene.
At Fusion Scale Hobbies, we carry everything you need to start your tree-making journey, from armature wire and foliage from Woodland Scenics to the paints and glues that bring it all together. Explore our full collection of scenery materials and find the perfect supplies for your next project.