


Model car decals are the final touch, the details that transform a good build into a jaw-dropping, realistic replica. They're what add everything from a classic race-winning livery to the tiny, almost-invisible factory markings that true enthusiasts appreciate. These thin, pre-printed graphics are designed to transfer onto your model's surface, perfectly replicating the details of a full-size vehicle.
Building the Foundation for Perfect Decals
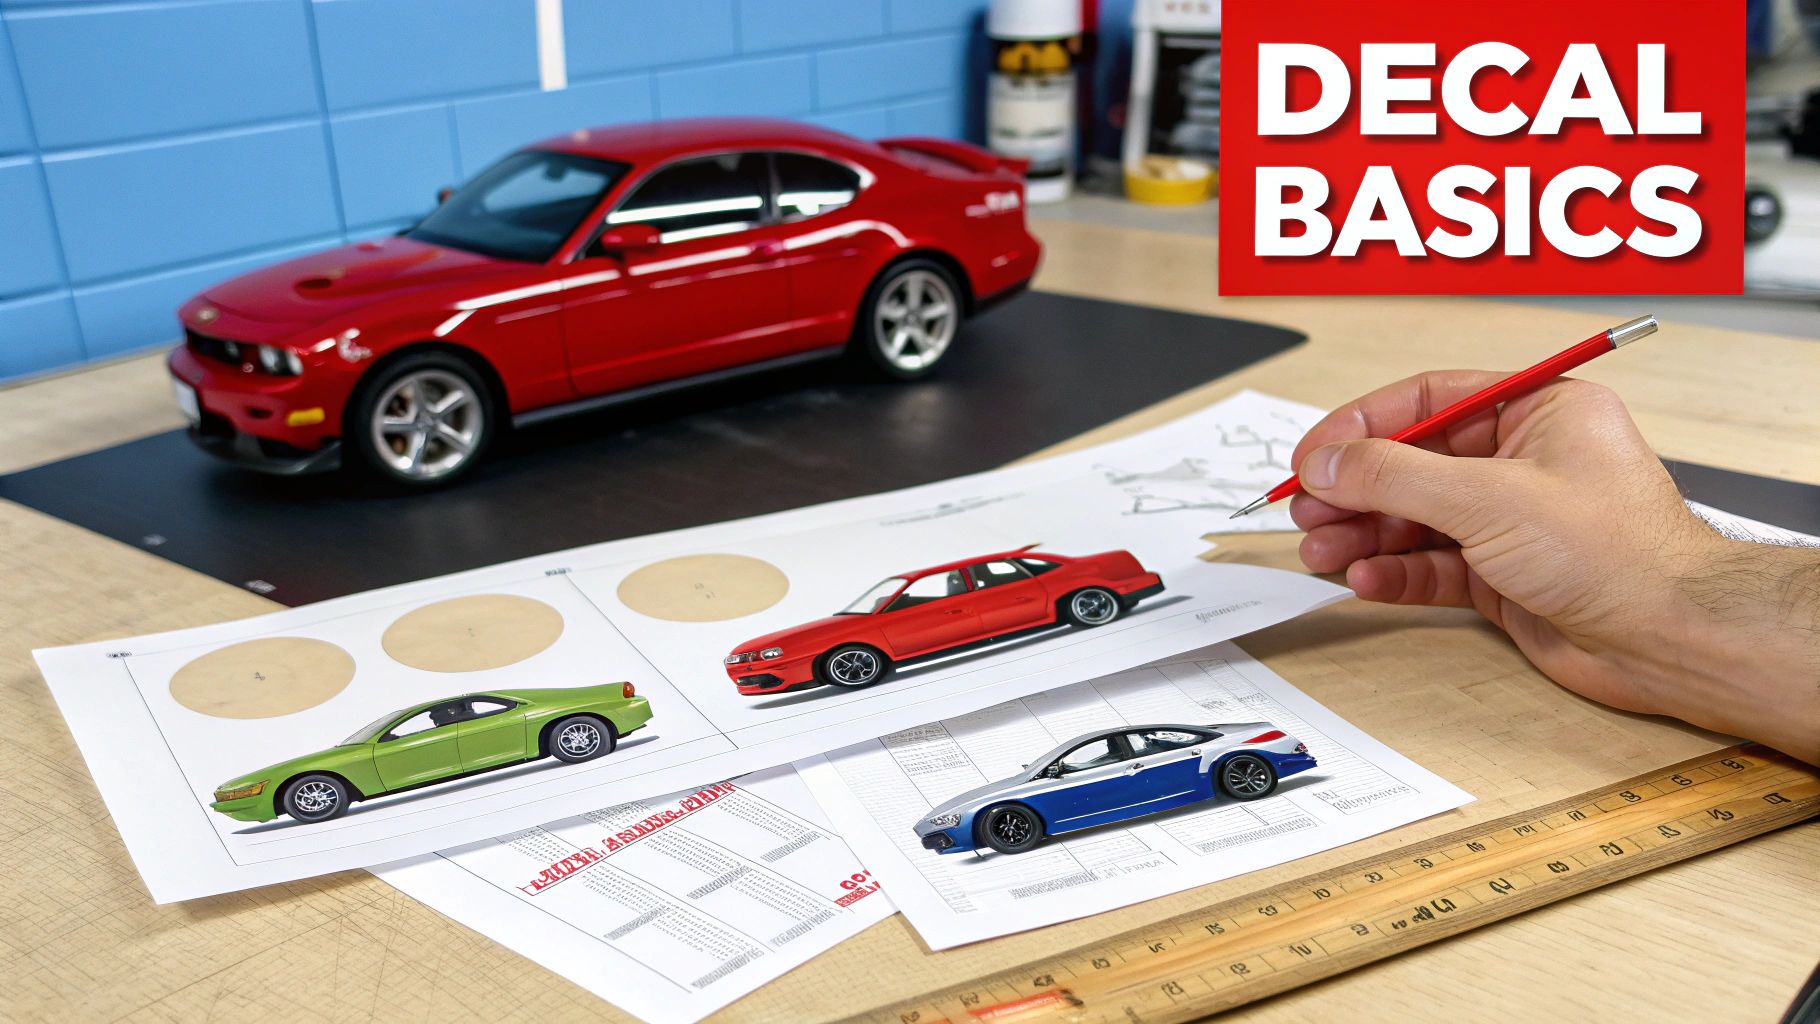
A flawless decal application starts long before you dip that first graphic in water. It all begins with understanding the different types of model car decals out there and knowing which one is right for your project.
Making the right choice upfront saves a ton of frustration later and sets you up for a professional-looking finish. This is the kind of foundational knowledge that separates a decent model from one that truly captures the spirit of the real machine.
Understanding the Three Main Decal Types
The type of decal you choose will directly impact your workflow and the final look of your model. Each one has its own quirks and is suited for different jobs.
Here's a quick rundown of what you'll typically find:
- Waterslide Decals: These are the old standby and what you’ll find in most model kits. They're a graphic printed on a special film with a water-soluble adhesive, all attached to a paper backing. A quick soak in water releases the decal from the paper, letting you slide it into position on your model.
- Dry-Transfer Decals: You might know these as "rub-downs." You place the sheet over the model and use a burnishing tool to rub the graphic onto the surface. They give you an incredible "painted-on" look with absolutely no visible film, but you only get one shot—once they're down, they can't be repositioned.
- Peel-and-Stick Decals: These are basically very high-quality stickers. They're the easiest to apply and are great for flat surfaces or creating custom liveries. The trade-off is that they often have a thicker, more noticeable edge than other types.
To help you decide, here's a quick comparison of the three main types you'll encounter.
Comparing Model Car Decal Types
This table breaks down the pros and cons of each decal type to help you pick the perfect one for your next build.
| Decal Type | Best For | Ease of Use | Pros | Cons |
|---|---|---|---|---|
| Waterslide | Most model kits, complex curves, fine details | Moderate | Conforms well to surfaces, very thin, widely available | Can tear easily, prone to "silvering" if not applied correctly |
| Dry-Transfer | Flat or gently curved surfaces, "painted-on" look | Difficult | No visible film edge, crisp graphics | One-shot application (no repositioning), can be brittle |
| Peel-and-Stick | Simple graphics on flat surfaces, beginners | Easy | Simple to apply, durable | Thick edges, can look less realistic, less flexible |
Choosing the right one really depends on what you're trying to achieve—whether it's the perfect finish on a concours-level build or a quick and easy custom job.
While these are the mainstays, it's always interesting to see how technology evolves. Modern innovations like UV DTF decals show how durable transfer technologies are advancing, adhering to all sorts of surfaces with incredible toughness.
Why Scale and Sizing Matter
Scale isn't just a number on the box; it's the golden rule for making a model believable. Using decals that don't match your model's scale is one of the fastest ways to shatter the illusion of a miniature vehicle. A 1:24 scale sponsor logo will look cartoonishly huge on a 1:43 scale car. Always, always double-check that the decal sheet you're buying is made for the specific scale you're building.
A great model tells a story through its details. The right decals are the language of that story, conveying everything from a vehicle's racing heritage to its everyday purpose with authenticity and precision.
If you're getting into making your own graphics, meticulous measurement is non-negotiable. Grab a set of digital calipers to measure the exact spot on the model where the decal needs to go, then scale your design in your software to match. You can dive deeper into creating your own custom decals and graphics for scale models to really make your projects one-of-a-kind. This extra step ensures every logo, stripe, and emblem is perfectly proportional and looks like it belongs.
Preparing Your Model for Decal Application
A killer decal job is all about the prep work. Seriously. You can have the best decals in the world, but if you slap them on a poorly prepared surface, they're going to look terrible. This is the step that separates a decent build from a showstopper.
Think of a matte or satin paint finish like a microscopic landscape of hills and valleys. When a decal goes over that, it can't settle into every tiny crevice. This traps air bubbles underneath, creating that milky, frosted look we all hate called silvering. It's the #1 enemy of a realistic finish.
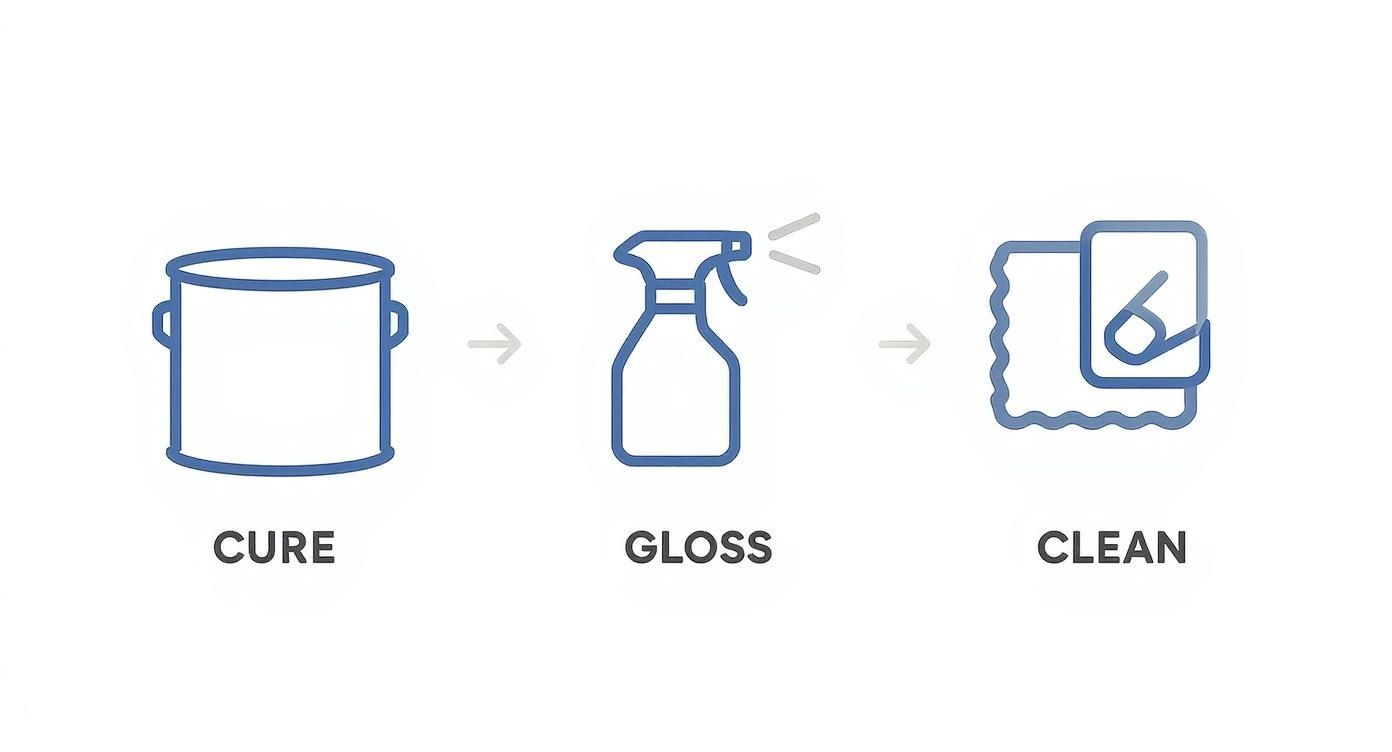
Why a Gloss Coat Is Non-Negotiable
The best weapon against silvering is a smooth, hard gloss clear coat applied over your cured paint. This simple step creates an ultra-smooth, glass-like surface for the decal to slide onto. With no texture to fight against, the decal can lay perfectly flat, letting you squeegee out every last drop of water and air.
The result? The decal looks like it was painted on, with no visible film edges. It's the secret sauce that takes a model from just "built" to contest-worthy. You can always knock back the shine later with a final matte or satin coat after the decals are sealed, but that initial gloss foundation is absolutely critical.
The Curing and Cleaning Process
Patience is a modeler’s best friend, especially when paint is involved. Never, ever apply decals or a clear coat over paint that isn't 100% cured. Solvents still gassing out from the paint can wreak havoc, reacting with the decal adhesive or the clear coat itself and causing wrinkles, cloudiness, or permanent damage.
Follow these simple but crucial steps for a perfect surface:
- Give It Time to Fully Cure: Enamel paints can take a week or more to fully harden and gas out. Lacquers and acrylics are usually faster, but always check the manufacturer's instructions. If you live in a humid climate, give it extra time.
- Get Rid of Contaminants: Even after curing, your model is a magnet for dust and oils from your fingerprints. Any little bit of grime will stop the decal from grabbing on properly.
- A Gentle Wipe-Down: Grab a soft, lint-free cloth and lightly dampen it with isopropyl alcohol or a dedicated model surface cleaner. Gently wipe down every area that will get a decal, then let it air dry completely.
That seamless, 'painted-on' look isn't luck—it's just methodical preparation. A clean, glossy surface gives the decal's imperfections nowhere to hide and forces it to meld perfectly with your model.
This drive for a perfect custom finish isn't just a scale modeler's obsession; it's a huge business in the real world. The global market for full-sized car decals was valued at around USD 2.3 billion in 2023 and is only getting bigger, all driven by the same passion for personalization we have. You can see a full breakdown of these market trends in a detailed report from DataIntelo.
Your Pre-Decal Checklist
Before you even think about cutting a decal from its sheet, get your workstation set up. Having everything you need within arm's reach prevents that frantic scramble that often leads to torn decals or misplaced tools. A smooth workflow is a happy workflow.
Essential Tools to Have on Deck:
- A Clean Work Area: Make sure your bench is free of dust, clutter, and stray cat hair.
- Shallow Dish of Warm Water: Warm water helps release the decal from the backing paper much faster and more cleanly than cold water.
- Hobby Knife with a Fresh Blade: A sharp #11 blade is non-negotiable for cutting decals cleanly without snagging or tearing the delicate film.
- Self-Healing Cutting Mat: Protects your workbench and gives you a stable surface to cut on.
- Fine-Tipped Tweezers: Absolutely essential for handling tiny decals without getting finger oils all over them.
- Soft Brushes: A couple of small, soft-bristled brushes are perfect for positioning decals and applying setting solutions.
Mastering the Waterslide Decal Process
This is where the magic really happens. A beautifully painted model is one thing, but applying decals is what transforms it into a detailed, authentic replica. The waterslide decal process can seem a little nerve-wracking at first, but with the right approach and a bit of patience, you can get that flawless, painted-on look that brings your project to life.
Forget the basic kit instructions for a minute. Let's get into the methods the pros use to guarantee a perfect finish every time. It all starts with a shallow dish of lukewarm water. If it’s too cold, the decal adhesive takes forever to release. Too hot, and you risk making the thin film too soft, which can lead to curling or tearing.
The perfect soak time is usually somewhere between 15 to 30 seconds, but honestly, it varies from brand to brand. The real key is just watching it. You’ll know the decal is ready when you can gently nudge it with a cotton swab and see it start to slide freely on its paper backing. Pull it out too soon and it’s still stuck; leave it in too long and you can wash away all the adhesive.
The Power of Decal Solutions
Here’s what separates the good builds from the great ones. To make your model car decals melt into every curve, panel line, and rivet, decal solutions are non-negotiable. They are absolutely essential. You’ll generally need two types: a setting solution and a softening solution.
- Setting Solution (like Micro Set): This is a mild fluid you brush onto the model's surface before sliding the decal into place. It does two things: it helps the decal grab on better and it starts the process of snuggling it down into the surface, pushing out any tiny air bubbles that cause that dreaded "silvering" effect.
- Softening Solution (like Micro Sol): This is a much stronger solvent that you apply with a soft brush after the decal is perfectly positioned. It actually softens the decal film, causing it to wrinkle up for a moment before it settles down and conforms perfectly to the most complex surfaces.
Using these in the correct order is critical. Many experienced modelers swear by products like the AK Interactive Decal Adapter Solution, which preps the surface and ensures a rock-solid bond.
A Practical Walkthrough: Applying a Racing Livery
Let's put this into practice. Imagine you're applying a large, tricky sponsor decal that has to wrap from a car's front fender right over the door panel—a common challenge with racing liveries.
Before a decal even touches your model, a three-step prep phase is critical.
This process—making sure the paint is fully cured, laying down a gloss clear coat, and cleaning the surface—creates the perfect foundation for decal adhesion. It’s your best defense against silvering.
With the surface prepped, you'd first brush a little setting solution onto the fender where the decal will start. After its quick soak, slide the decal carefully from its backing paper onto that wet area using a soft brush. Try not to use your fingers; the oils on your skin can mess with the adhesion.
Gently nudge the decal into its final position. Once you’re happy, use the corner of a paper towel to carefully wick away the excess water from underneath, trying not to shift the decal.
Now for the door panel. Let the decal settle for a few minutes. Then, take a soft brush and apply a softening solution over the part of the decal covering the door's panel line. You’ll see it start to wrinkle up—don’t panic! This is supposed to happen.
Do not touch the decal while it's wrinkling. The film is incredibly soft at this stage and you will damage it. As it dries, it will pull itself taut and sink deep into the panel line, creating a perfect, painted-on look.
After about an hour, you can apply another light coat of the softener if it needs a little more help conforming. This is the technique that makes a decal look like it’s part of the paint job, not just a sticker on top. While we’re focused on applying waterslide decals here, understanding the basics of printing on transfer paper can give you a deeper appreciation for how these materials work. Mastering this whole process is what really elevates a good model into a showstopper.
Troubleshooting Common Decal Disasters
Even when you do everything right, decals can still have a mind of their own. One might tear as you slide it into place, another might refuse to lay flat over a rivet, and some just develop that dreaded milky haze after they dry. Don't panic—most of these issues are fixable with a bit of patience and the right technique.
This is the part of the process where knowing how to react saves your entire project. Having a few troubleshooting tricks up your sleeve turns a potential disaster into a minor setback, making sure your hard work doesn't end up in the bin.
Battling the Dreaded Silvering Effect
Silvering is the number one enemy of a realistic finish. It's that ugly, hazy sheen that appears under the decal's clear film once it's dry, caused by microscopic air bubbles trapped between the decal and the model. This is what shatters the "painted-on" illusion we're all chasing.
The main culprit is almost always a matte or semi-gloss surface. That rough texture prevents the decal from making full contact, trapping air in the tiny valleys of the paint. While a gloss coat is your best defense, sometimes silvering still sneaks in.
If you spot it after the decal is dry, don't worry. You can still save it.
- Puncture and Soften: Grab a brand-new, sharp hobby knife blade and gently prick the silvered areas a few times. This creates tiny escape routes for the trapped air.
- Apply a Softening Solution: Carefully brush a strong decal softening solution (like Micro Sol) over the pricked area. The solution will seep into the holes, soften the decal film, and help it finally settle down, pushing the air out.
- Repeat If Necessary: You might need to do this two or three times for stubborn spots. Just be sure to let the solution dry completely between applications.
The key to fixing silvering is giving the trapped air an escape route. The combination of a tiny puncture and a strong softening solution forces the decal film to conform tightly to the surface, eliminating the air gap that causes the haze.
Taming Decals on Complex Surfaces
Sometimes a decal just refuses to cooperate with a complex curve, a deep panel line, or a raised detail like a rivet. You've positioned it perfectly, but it's just bridging over the details instead of sinking into them. This is exactly where your softening solution becomes your most valuable tool.
Go ahead and apply a generous coat of softener right onto the stubborn part of the decal. You'll probably see it wrinkle up almost immediately—this is totally normal, so do not touch it. As it dries, the decal film will shrink and pull itself down tightly over the surface details. For really deep panel lines, a second or third application might be needed to get it to settle in completely.
Rescuing Folded or Torn Decals
It happens to everyone. You’re carefully sliding a delicate decal into place, and suddenly it folds over on itself, becoming a sticky, frustrating mess. Or even worse, a critical part of the graphic tears right off.
For a Folded Decal:
The best thing to do is act quickly before it has a chance to set. Use a soft brush to add a drop of water or decal setting solution right onto the fold. This lubricates the decal and gives you a chance to gently tease it open with the tip of your brush or a pair of fine-tipped tweezers. The key is to go slowly and avoid pulling on it.
For a Torn Decal:
If a decal tears, don't just toss it. Carefully slide the main piece into position on the model. Then, float the torn piece off the backing paper and slide it up to meet the main graphic, aligning the edges as perfectly as you can. A little setting solution will help them bond together. Once it's all sealed under a final clear coat, a well-repaired tear will be nearly invisible. This simple technique can save your rare or custom model car decals from ruin.
Decal Problem-Solving Cheat Sheet
When things go wrong in the middle of a build, it helps to have a quick reference. Here’s a rundown of the most common decal headaches and how to tackle them on the fly.
| Problem | Primary Cause | Prevention Tip | How to Fix It |
|---|---|---|---|
| Silvering | Air trapped under the decal film, usually on a matte surface. | Always apply decals to a smooth, gloss-coated surface. | Puncture the decal with a sharp blade, then apply a strong softening solution like Micro Sol. |
| Lifting Edges | Decal didn't adhere properly; surface might have been dirty. | Ensure the surface is clean and use a setting solution. | Apply a small amount of setting solution under the lifted edge and press down gently with a damp cotton swab. |
| Wrinkling | A normal reaction to softening solution; also caused by overworking the decal. | Let softening solutions do their work without touching the decal. | Do not touch it! The wrinkles will smooth out as the solution dries and the decal shrinks. |
| Tearing | Decal is old and brittle, or was handled too roughly during application. | Test a small, unused decal from the sheet first. Use a decal film restorer on old sheets. | Carefully align the torn pieces on the model and use setting solution to bond them. Seal with a clear coat. |
| Won't Conform | The decal is too thick or the surface detail is too sharp. | Use a strong softening solution and apply it in multiple thin coats. | Apply more softening solution. For deep panel lines, you can gently slice the decal along the line after the solution has dried slightly. |
Think of this table as your first line of defense. With a little practice, these fixes will become second nature, and you'll be able to save just about any decal that gives you trouble.
Sealing and Protecting Your Finished Work
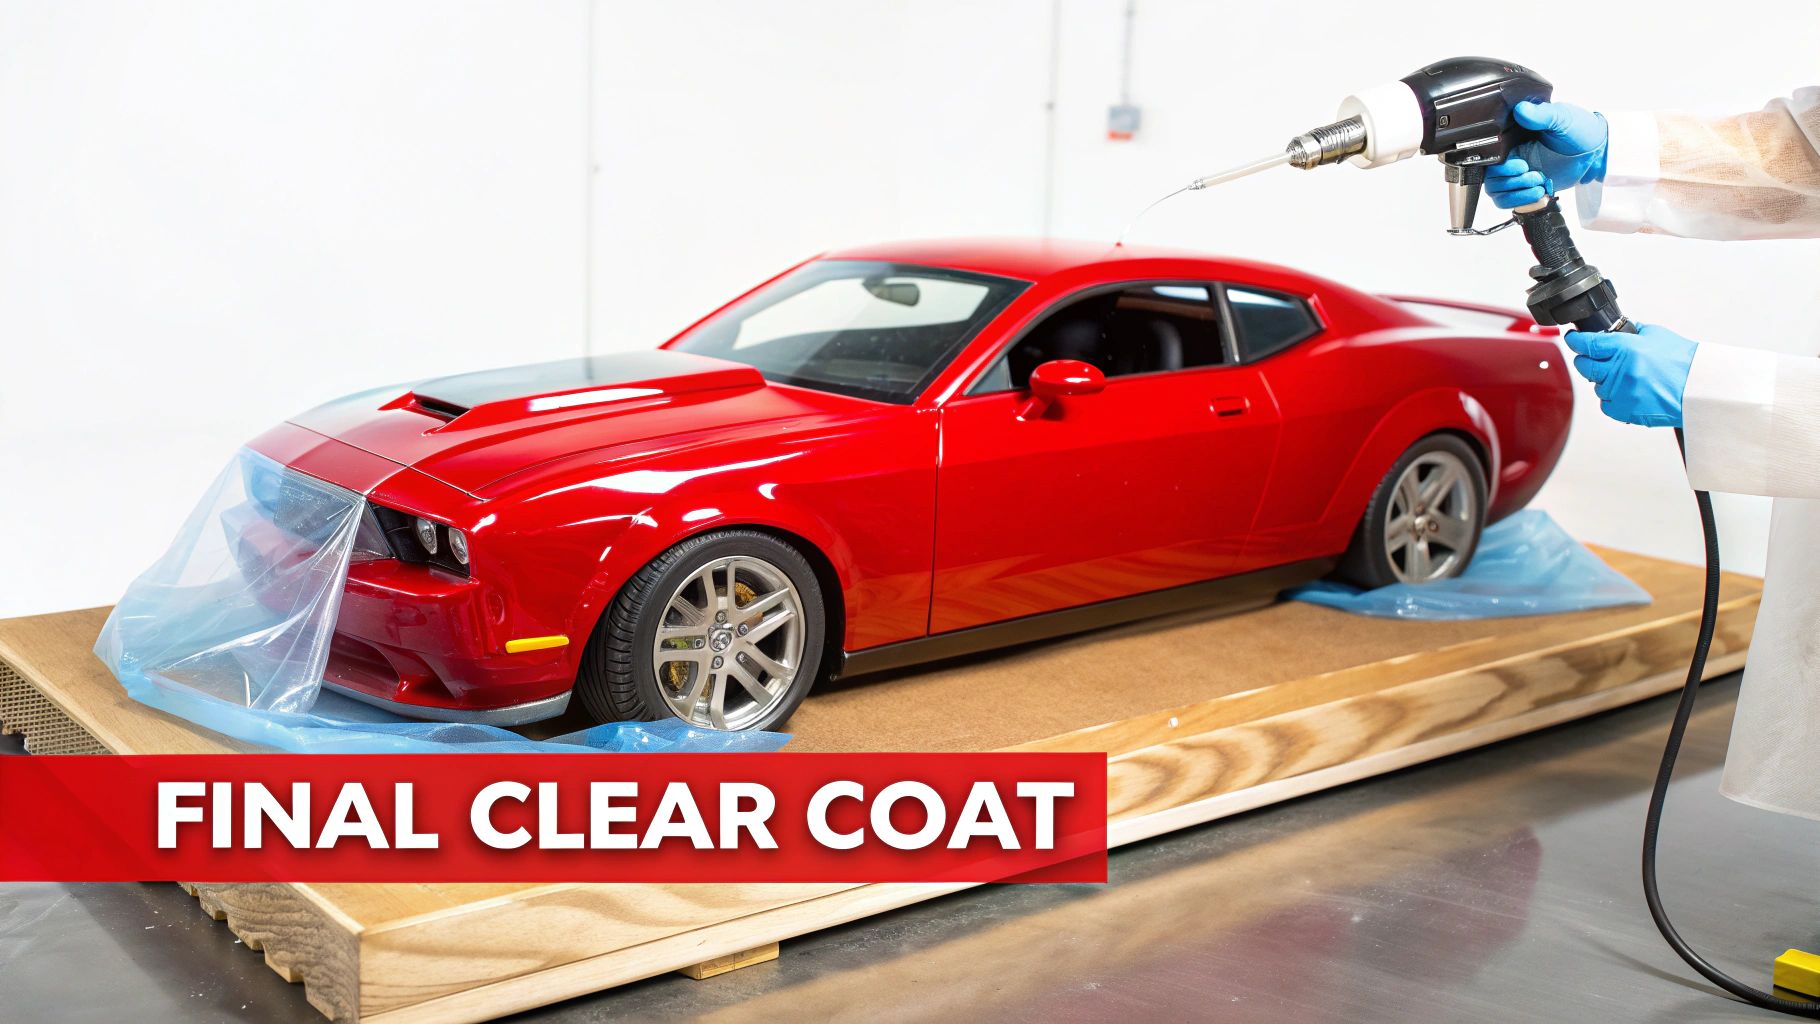
Your model car decals are down, they’ve settled into every curve, and the build is looking sharp. Don't stop now. This next step—sealing your work with a clear coat—is what separates a good model from a great one. It’s the final lock-in that protects all your hard work.
Think of it as a shield. This last layer guards those delicate decals against dust, fingerprints, and the slow fade caused by UV light. More importantly, it melts away the decal edges, making them look like they were painted on from the start. Skip this, and even the best decal job is at risk of peeling or getting damaged with just a bit of handling.
Choosing the Right Sheen for Realism
The type of clear coat you pick dramatically changes the final look and feel of your model. There's no single "best" option here; it all comes down to what you're trying to replicate from the real world.
- Gloss Finish: This is your go-to for that high-shine, dripping-wet look. Perfect for a showroom-new supercar, a polished classic, or any build where you want the colors to pop with deep vibrancy.
- Semi-Gloss Finish: A much more versatile and common choice, semi-gloss gives you a moderate sheen. It's the finish you'd see on a well-maintained daily driver or a factory-fresh car that hasn't been buffed to a mirror shine.
- Matte Finish: A totally flat, non-reflective coat. This is essential for military vehicles, beat-up race cars, or specific parts like primered body panels and rubber trim. It eats light and gives the model a tough, utilitarian vibe.
The final clear coat is the last word your model speaks. A gloss finish screams 'showroom,' while a matte finish whispers 'battle-tested.' Choosing the right one is key to telling your model's story accurately.
Best Practices for Applying the Final Coat
Applying clear coat requires a bit of finesse. If you go too heavy, you can reactivate the decal softener or make the inks bleed. The trick is to build it up gradually.
Start with a light "mist coat" from about 10-12 inches away. Just dust the surface. Don’t try for full coverage. Let that flash off for 15-20 minutes. This light pass acts as a protective barrier over the decals.
Once that first coat is dry to the touch, you can follow up with two or three slightly heavier "wet coats" to get the even finish and shine you’re after. Just be sure to give it enough drying time between coats, following whatever the manufacturer recommends. This patient approach is your ticket to a flawless finish that protects your model car decals for years.
It’s this attention to a quality finish that defines the broader vehicle graphics market. The full-size car decal industry was valued at around USD 7.8 billion in 2024, driven by a demand for durable, high-quality graphics that last. You can dive deeper into the trends with this complete car decal market report.
Common Questions About Model Car Decals
Even after you’ve got the basics down, questions always pop up during a build. Getting the right answers can be the difference between a frustrating night at the workbench and a flawless finish. Let’s tackle some of the most common questions modelers have about model car decals.
Think of this as your go-to FAQ for overcoming those little hurdles and building your confidence.
Can I Use Old Model Car Decals?
The short answer is yes, but you have to be smart about it. Decals that have been sitting in a box for 10-15 years (or more) can get incredibly brittle. The thin carrier film dries out over time, and the moment it hits the water, the whole thing can shatter into a dozen tiny pieces. It’s a heartbreaking experience, especially when you’re working on a rare or out-of-production kit.
Fortunately, there’s a simple trick to save them.
- Apply a Liquid Decal Film: A product like Microscale's Liquid Decal Film is an absolute lifesaver. You just brush a thin, even coat over the entire decal sheet—or at least over the specific graphics you plan to use.
- Let It Cure: Give the film about 15-20 minutes to dry completely. This creates a brand-new, flexible carrier film that holds the old, fragile decal together in one piece.
- Test Before You Commit: Always, always test your work on a decal you don’t need for the final model. The copyright info or an extra logo on the sheet is perfect for this. This little step confirms the film did its job before you risk a critical graphic.
This simple technique can salvage vintage kits and bring classic liveries roaring back to life. In fact, reviving old graphics is a specialized skill in itself. You can read more about how it’s done in the story of 3 Amigos Decals.
What Is the Difference Between Decal Setting and Softening Solutions?
This is one of the most important things to understand in the entire process. Getting this right is absolutely crucial for a professional look. While they sound similar, "setting" and "softening" solutions do two totally different jobs.
A decal setting solution (like Micro Set) is the mild one. You apply it to the model's surface before sliding the decal on. Its main job is to improve adhesion and help the decal "wet" the surface, pushing out tiny air bubbles that cause silvering. Think of it as the prep step that helps the decal get a solid grip.
On the other hand, a decal softening solution (like Micro Sol) is a much stronger solvent. You apply this after the decal is perfectly positioned. This solution literally melts the decal film, allowing it to conform to complex curves, deep panel lines, and raised details like rivets. This is the magic ingredient that creates that coveted "painted-on" look.
The rule of thumb is simple: Set first, Sol second. The setting solution preps the surface for the decal, while the softening solution makes the decal conform to the surface. Using them in the right order is non-negotiable for success.
How Do I Make My Own Custom Model Car Decals?
Creating your own custom model car decals is one of the most rewarding parts of the hobby. It gives you total control to personalize your build. The process involves designing your graphics and printing them on special decal paper made for inkjet or laser printers.
Here’s the basic workflow:
- Design Your Graphic: Use any design software you're comfortable with to create your logos, text, or images. Just make sure your final design is scaled correctly for your model.
- Choose the Right Paper: You must use decal paper made specifically for your type of printer (inkjet or laser). Using the wrong kind will lead to a smudged mess and could even damage your printer.
- Print Your Decals: Print the design onto the glossy side of the decal paper, following the manufacturer’s instructions.
- Seal the Ink (Crucial for Inkjet): This is the step you can't skip. If you're using an inkjet printer, the ink is water-soluble. You must seal the printed sheet with a few light coats of a clear acrylic spray (like Testors Decal Bonder). This makes the ink waterproof so it doesn’t run when you soak the decal.
- Apply Like Normal: Once the sealer is completely dry, you can cut out and apply your custom decals just like any others.
Do I Have to Use a Gloss Coat Before Applying Decals?
While you can technically apply a decal to any surface, putting down a gloss coat first is a non-negotiable best practice among experienced modelers. Applying decals directly over a matte or satin finish is the number-one cause of silvering.
A matte surface looks smooth, but under a microscope, it’s actually rough and full of tiny peaks and valleys. When you place a decal over it, the film can't make full contact, trapping countless microscopic air bubbles. That trapped air is what creates that ugly, silvery haze you see under the film.
A smooth gloss coat gives you a perfectly flat, non-porous surface. This allows the decal to lay down completely flat, letting you squeegee out every last bit of water and air from underneath for a crystal-clear finish. You can always hit it with a matte or semi-gloss clear coat after the decals are sealed to get the final sheen your project needs.
At Fusion Scale Hobbies, we carry everything you need to perfect your decal work, from setting solutions and clear coats to the tools that make application a breeze. Explore our massive selection of modeling supplies and take your next build to a new level of realism. Visit us at https://fusionscalehobbies.com to find all the essentials for your workbench.