


Turning a box of gray plastic parts into a jaw-dropping, miniature aircraft all comes down to one thing: painting. Choosing and applying the right aircraft model paint is so much more than just splashing on some color. It's an art form that breathes life into your model, defines its personality, and makes those tiny, intricate details pop.
Consider this guide your pre-flight checklist for getting a professional-quality finish every single time.
Your Foundation for a Flawless Model Finish
Think of this process like prepping a real aircraft for its first flight. Just as a real plane needs meticulous checks from nose to tail, your model demands a smart, deliberate approach to its paint job. We'll walk through everything from the basic chemistry behind different paint types to advanced techniques for weathering and finishing.
The whole painting sequence really boils down to three core stages, as this flowchart shows.
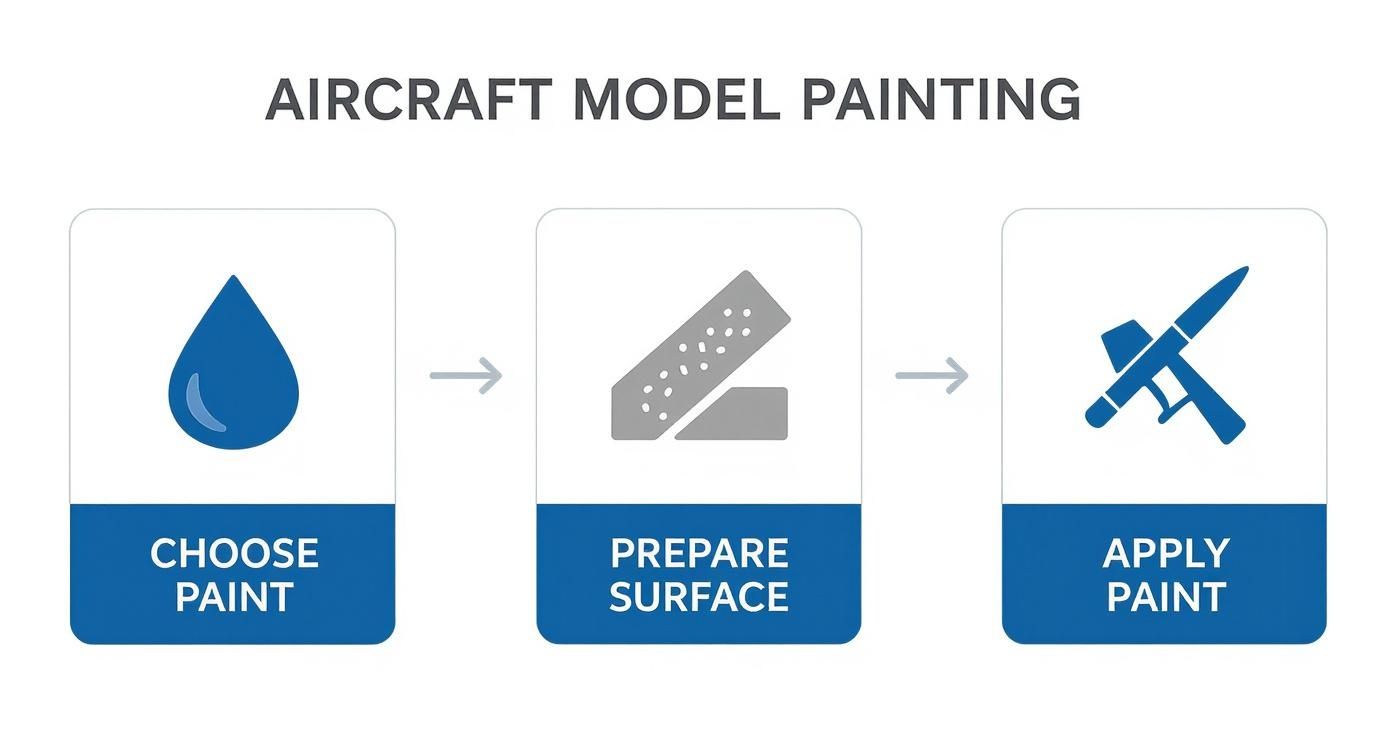
This highlights a crucial lesson every modeler learns: a fantastic final result depends just as much on what you do before and after the color goes on. The journey from a simple kit to a masterpiece starts right here, with understanding the fundamentals. Get these right, and you'll sidestep common frustrations and produce work you're truly proud of.
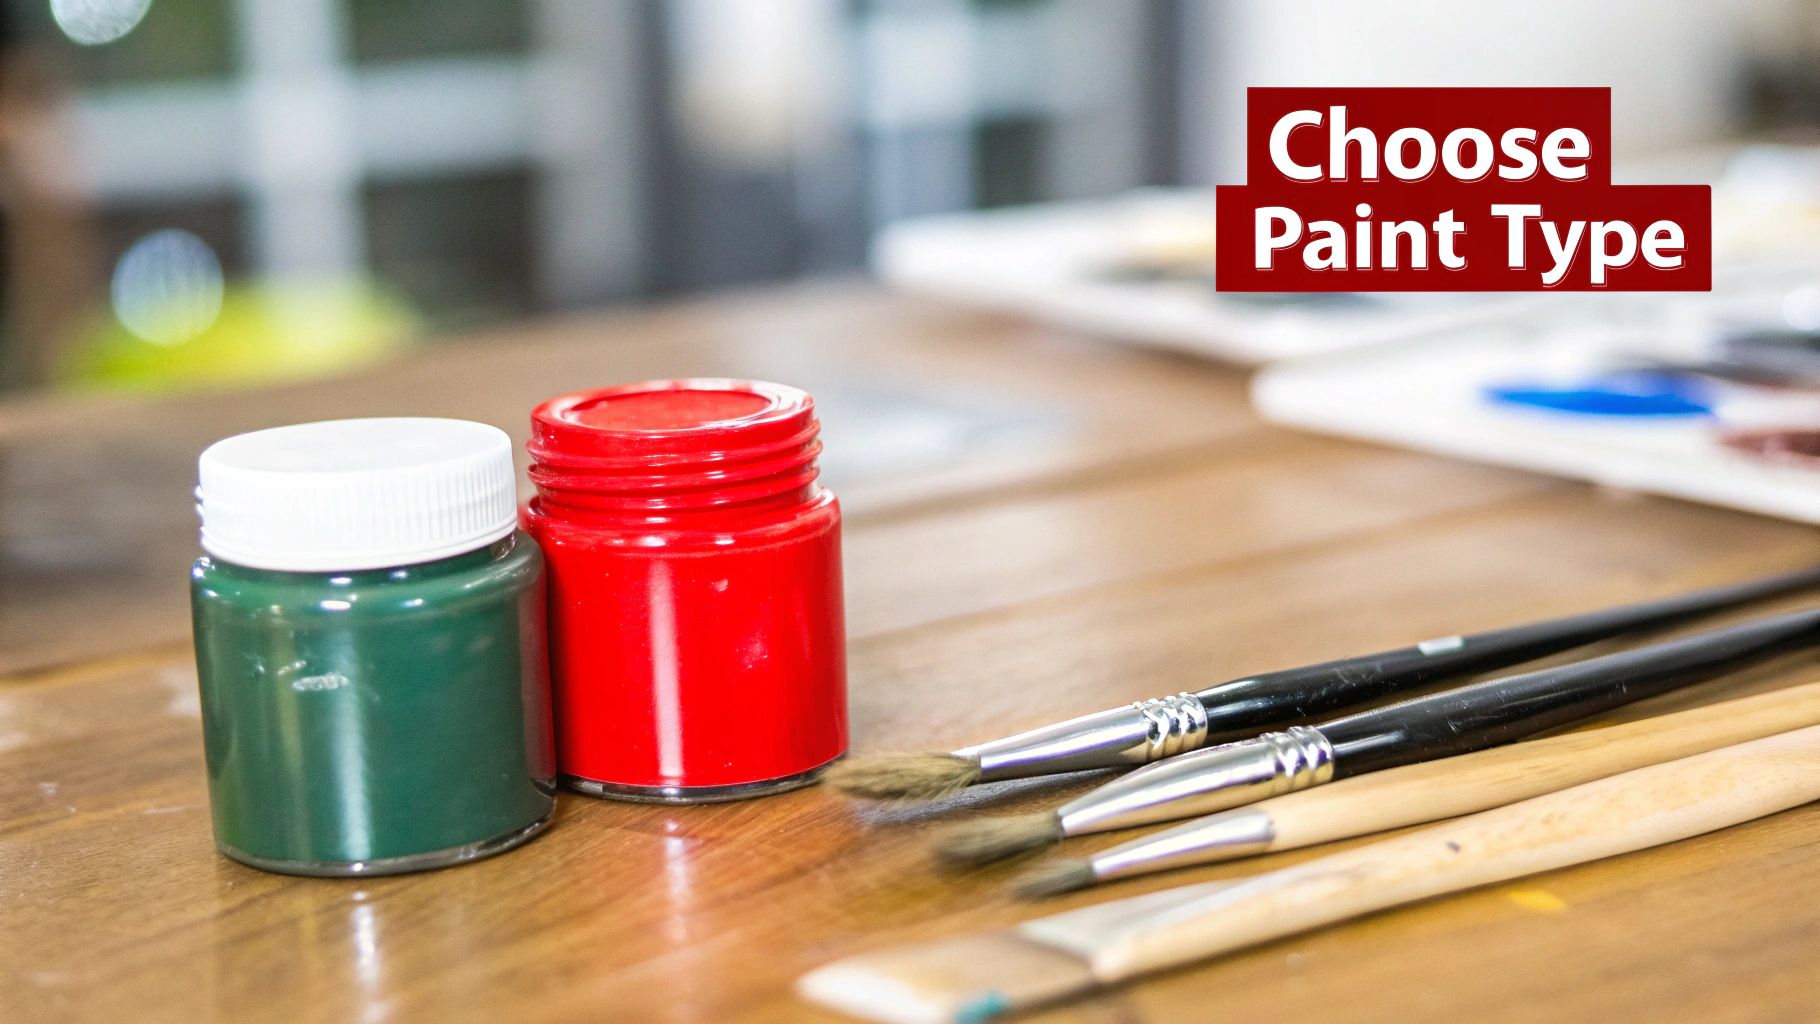
To get started, let's break down the three main types of paint you'll find on the hobby shelf: acrylics, enamels, and lacquers. Each has its own distinct personality, and knowing their differences is the first critical step.
Quick Comparison of Primary Model Paint Types
This table gives you a quick, at-a-glance summary of the big three. It’s perfect for making a fast decision based on your project needs and experience level.
| Paint Type | Base | Thinner | Dry Time | Best For |
|---|---|---|---|---|
| Acrylic | Water | Water or Specific Thinner | Fast (10-20 min) | Beginners, Airbrushing, Easy Cleanup |
| Enamel | Oil/Solvent | Mineral Spirits/Turpentine | Slow (6-8 hrs) | Brush Painting, Durability, Self-Leveling |
| Lacquer | Solvent | Lacquer Thinner | Very Fast (5-10 min) | Hard Finishes, Airbrushing, Rapid Coats |
As you can see, there’s no single "best" paint—only the best paint for the job at hand. Are you a beginner who values easy cleanup? Acrylics are your friend. Need a super tough finish for a model that will be handled often? Enamels or lacquers might be the better call.
Choosing Your Paint: Acrylics, Enamels, and Lacquers
Picking the right paint for your aircraft model is a lot like a pilot choosing the right plane for a mission. You wouldn't fly a short-range commuter jet across the Atlantic, right? In the same way, you don't use a delicate, specialized paint when you need a rock-solid, durable finish. In scale modeling, your three main choices are acrylics, enamels, and lacquers.
Each of these paint families has its own personality, with a unique set of strengths and weaknesses. Forget the dry textbook definitions—it's better to think of them as different tools for different jobs. Your choice will affect everything from drying time and fumes to the final look and feel of your model.
Getting a handle on these core differences is the first step toward getting that professional finish you're after and avoiding a lot of common frustrations. Let's break down each type so you can make the right call for your next project.
The User-Friendly Choice: Acrylic Paints
Acrylics are the modern workhorse of the modeling world, and for good reason. They are water-based, which makes them incredibly easy to work with, especially for beginners or anyone working in a smaller space without a dedicated spray booth. The low odor and non-toxic formula are huge pluses.
Cleanup is a breeze—just use water for wet paint or a little acrylic airbrush cleaner for anything that has dried. This simplicity really lowers the barrier to entry for new modelers. Plus, they dry fast to the touch, often within 10-20 minutes, letting you lay down more coats or move on to the next step of your build much sooner.
Acrylics are your go-to for versatility and safety. Their fast drying times and simple water-based cleanup make them ideal for both airbrushing large surfaces and intricate brush painting, all with minimal fumes.
But that quick drying time can sometimes be a double-edged sword. When you're brush painting, it can lead to visible brush strokes if you're not careful. Acrylics also tend to be less durable than their solvent-based cousins and almost always need a good primer for strong adhesion to bare plastic. For a deeper dive, check out our guide on the key differences between acrylic and enamel model paints.
The Durable Classic: Enamel Paints
Enamels are the old guard of model painting. For decades, they were the undisputed king for achieving a tough, resilient finish. These oil-based paints are famous for their fantastic self-leveling properties, which is a massive advantage for anyone painting with a brush.
As you apply an enamel, it flows out smoothly, hiding or eliminating brush strokes as it slowly dries. This long drying time—typically 6-8 hours or more—is both a blessing and a curse. It gives you plenty of time to work the paint, but it also means a much longer wait between coats.
Enamels are known for their:
- Exceptional durability: Once cured, the paint creates a hard shell that stands up to handling and resists chipping.
- Superior flow: This makes them fantastic for brush-painting small, detailed parts like cockpit instruments or landing gear.
- Rich finish: They produce a deep, authentic sheen that many modelers love for historical aircraft.
The main drawback is their strong solvent smell and the need for mineral spirits or turpentine for thinning and cleanup. Good ventilation isn't just a suggestion; it's a necessity.
The High-Performance Option: Lacquer Paints
If acrylics are the versatile daily driver and enamels are the reliable work truck, then lacquers are the high-performance sports car. Lacquer-based paints offer the fastest drying times and the hardest, most durable finish of all three types.
These paints dry incredibly fast, often in just 5-10 minutes, which allows for rapid coat application without long waits. Their thin consistency is perfect for airbrushing, as they atomize beautifully and lay down in super-fine layers that preserve every rivet and panel line. A tough lacquer finish is also highly resistant to the solvents used in weathering products, which is a huge bonus.
The downside? Lacquers are "hot," meaning their powerful solvents can damage underlying paint layers or even melt bare plastic if applied too heavily. They also have the strongest fumes, so a respirator mask and serious ventilation are non-negotiable.
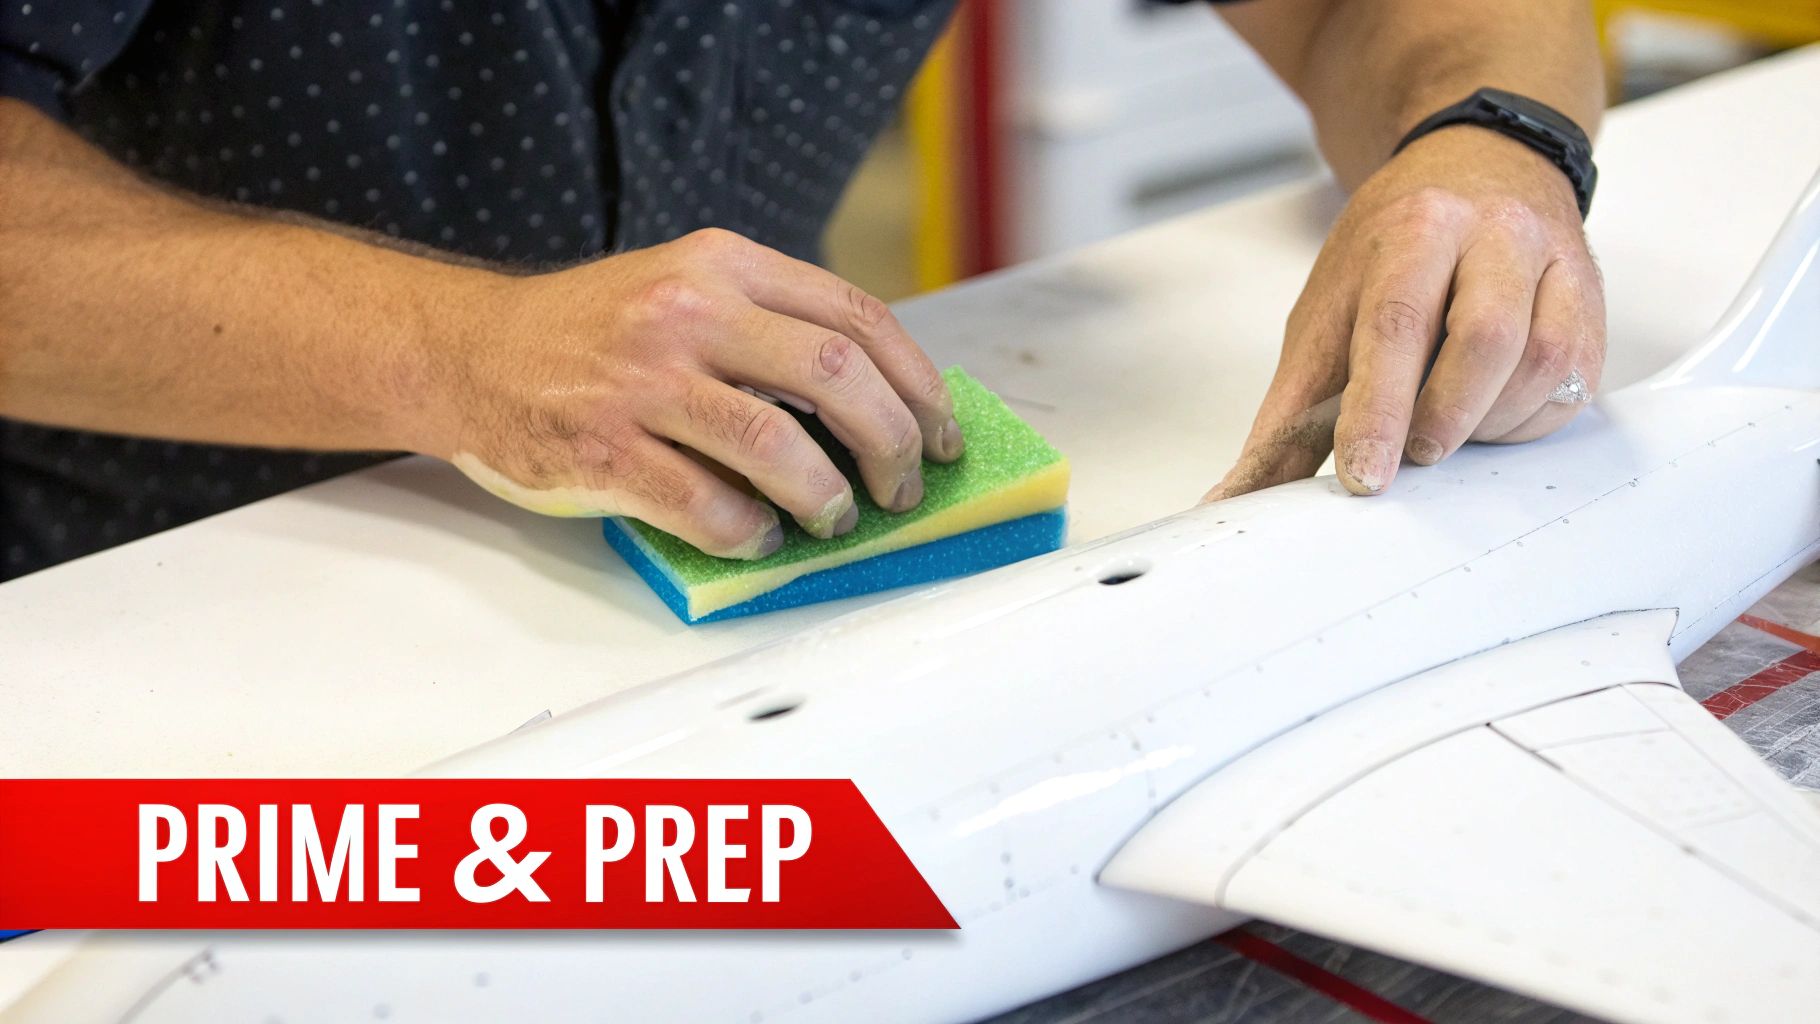
Preparing Your Model for a Perfect Paint Job
A stunning paint job is built on a flawless foundation. Just like a flight crew inspects every inch of an aircraft before takeoff, your model needs some meticulous prep work long before you even think about spraying color. This is where you transform a collection of plastic parts into a perfect, seamless canvas for your aircraft model paint.
Here’s a hard truth of modeling: paint doesn’t hide imperfections; it magnifies them. Every tiny scratch, glue smudge, or rough seam will scream for attention under a fresh coat of paint. Taking the time to get the surface right is probably the most critical step in the whole process. It’s the difference between a realistic replica and a plastic toy.
From Washing to Sanding
First things first—give your model a bath. Brand new plastic kits are almost always coated with a thin, oily film called a mold-release agent. This stuff is great for getting the plastic out of the steel molds during manufacturing, but it’s terrible for paint adhesion.
A simple wash in warm water with a bit of mild dish soap is all it takes. Use an old, soft-bristled toothbrush to gently scrub every part, then give them a good rinse and let them air dry completely. Don’t rush this part.
Once the parts are bone dry, it's time to deal with any seam lines where fuselage halves or wing sections were joined. Meticulous sanding and filling are what create that unbroken, single-piece look. Grab some hobby-grade sanding sticks or fine-grit sandpaper—start around 400 grit and work your way up to 1000 or higher—to smooth these seams until they vanish. For any bigger gaps, a good modeling putty will do the trick; just apply it, let it cure, and sand it smooth.
The Unsung Hero: Primer
After all that cleaning and sanding, you’re ready for the true star of surface prep: primer. Primer is a special undercoat that solves several key problems at once, making it an essential step for a professional finish. It’s the handshake between the bare plastic and your final color coats.
Think of primer as the ultimate quality control inspector for your model. It creates a uniform surface that reveals hidden flaws, gives your paint something to really grip onto, and ensures your final colors look true and vibrant.
Without primer, you're painting on a bare, sometimes slick, surface. This is asking for trouble—paint can bead up, chip off easily, or look patchy and uneven.
Choosing the Right Primer for the Mission
Primers come in a few different colors, and your choice can be a strategic move that impacts the final look. The three most common colors are gray, white, and black, and each one has a specific job.
- Gray Primer: This is the workhorse, the universal standard. It provides a neutral base that works well under almost any color. More importantly, it’s fantastic for spotting surface details and imperfections that you might have missed.
- White Primer: Reach for this when you’re planning to use bright colors like yellow, red, or light blues. A white base helps these colors pop and achieve their true vibrancy without needing a dozen coats to fight the underlying plastic color.
- Black Primer: This is an awesome shortcut for a technique called "pre-shading." By starting with a black base, you can let the recessed areas and panel lines stay naturally darker when you spray your main color over the top. It instantly creates a sense of depth and shadow with minimal effort.
Ultimately, this entire preparation phase sets the stage for everything that comes next. Investing an extra 30-60 minutes here will save you hours of frustration and heartache later. A clean, smooth, and properly primed surface is the real secret to making your aircraft model paint look absolutely spectacular.
Applying Paint With Airbrushing and Brush Techniques
With your model's surface perfectly prepped and primed, it's time for the main event: applying the color. This is where your aircraft truly begins to take on its character and come to life.
The two workhorses for applying aircraft model paint are the airbrush and the traditional paintbrush. Mastering both isn't just a good idea—it's the mark of a skilled and versatile modeler.
This isn't a debate about which tool is better; it’s about knowing their specific jobs. Think of an airbrush as your broadsword, perfect for covering large areas with smooth, even coats. The paintbrush, in contrast, is your dagger—ideal for precise, close-quarters work where absolute control is everything.
Using the right tool for the right task is what separates a good model from a great one, from the sprawling camouflage on the wings down to the tiniest switch in the cockpit. Let's dig into when and how to deploy each of these essential tools.
Achieving a Factory Finish with an Airbrush
If you want those silky-smooth, flawless finishes you see on real aircraft, an airbrush is your best friend. It atomizes paint into a fine, controllable mist, letting you build up whisper-thin, even layers of color. This method is the secret to everything from a single-color scheme to complex, soft-edged camouflage that's nearly impossible to replicate by hand.
The two most critical variables in airbrushing are your paint consistency and air pressure. The goal is to thin your paint to the consistency of skim milk—thin enough to flow smoothly but not so watery that it runs. Getting this right is a fundamental skill, and you can learn all about how to thin acrylic paint for your models in our detailed guide.
Once your paint is thinned correctly, you’ll need to set your air compressor's pressure, usually somewhere between 15-20 PSI (pounds per square inch). This low pressure is key; it prevents the paint from drying in mid-air and hitting your model as a rough, sandy powder.
An airbrush doesn't just apply paint; it controls it. By mastering the delicate balance of paint thinning and air pressure, you can lay down coats so fine they preserve every rivet and panel line, achieving a true scale effect.
Always practice on a piece of scrap plastic or an old model to dial in your settings. Consistent trigger control and smooth, overlapping passes are the keys to avoiding splatters and achieving that beautiful, uniform coat you're after.
Mastering Control with Brush Painting
While the airbrush excels at large-scale work, the humble paintbrush remains an essential tool on every modeler's bench. Its strength lies in its unmatched precision and control, making it the perfect choice for detail work where an airbrush would be clumsy and wildly inefficient.
Brush painting is the go-to method for:
- Intricate Cockpits: Painstakingly painting instrument panels, side consoles, and ejection seats.
- Landing Gear Bays: Detailing the complex wiring, hydraulic lines, and structural components.
- Small Parts: Handling tiny items like antennas, pitot tubes, and wheel hubs with exacting precision.
The biggest challenge with a brush is eliminating those pesky, visible brush strokes. The secret is to use high-quality brushes and properly thinned paint. Instead of slathering on one thick, heavy coat, apply two or three thin ones. This layering technique builds up a rich, smooth color that completely hides any brush marks. Just be sure to let each layer dry completely before applying the next to avoid dragging the underlying paint.
Airbrushing vs. Brush Painting for Aircraft Models
Choosing the right technique almost always comes down to the specific task at hand. This table breaks down where each method shines, helping you make the best decision for different parts of your aircraft model build.
Airbrushing vs Brush Painting for Aircraft Models
| Technique | Best Use Cases | Pros | Cons | Skill Level |
|---|---|---|---|---|
| Airbrushing | Large surfaces, camouflage patterns, gloss coats, pre-shading | Smooth, even finish; fast coverage; preserves details | Requires more equipment; steep learning curve; significant cleanup | Intermediate |
| Brush Painting | Cockpits, landing gear, small details, figures, touch-ups | High precision; minimal setup and cleanup; low initial cost | Prone to brush strokes; slow for large areas; difficult for soft edges | Beginner |
Ultimately, a truly great model leverages the strengths of both. You’ll likely airbrush the main fuselage and wings, then switch to a fine-tipped brush to bring the cockpit and landing gear to life with crisp details. By understanding and practicing with both your airbrush and your paintbrushes, you’ll have the versatility to tackle any painting challenge and achieve stunningly realistic results on every build.
Bringing Your Aircraft to Life With Realistic Finishes
The final steps are where all your hard work pays off. This is the stage where a well-built model stops looking like a toy and starts to become a breathtaking miniature aircraft. We're moving beyond just applying color and into the art of storytelling with the finish itself. It all begins with protecting your paint job and prepping the surface for the final, critical details.

This is where you'll be layering clear coats, carefully applying delicate decals, and adding all the grime and wear that mimic a real-world machine. Each layer adds a new dimension of depth and character, turning a static plastic object into something that feels like it has a history.
Sealing the Deal With Clear Coats
Think of a clear coat as the armor for your paint. It’s a transparent shield that protects all your hard work from fingerprints, dust, and—most importantly—the harsh solvents you might use for weathering later on. But it does more than just protect; the sheen of the clear coat is a technical tool that determines the final look and how well your decals will perform.
You've got three main sheens to work with:
- Gloss Finish: This gives you a shiny, reflective surface. Its most important job is to create an absolutely smooth foundation for decals. This is the secret to avoiding "silvering," that ugly effect where tiny air bubbles get trapped under a decal, ruining the painted-on look.
- Satin Finish: A fantastic middle-ground, a satin coat gives you a subtle, low-sheen look that perfectly replicates the finish on many modern military jets and civilian airliners. It’s not too shiny, not too flat.
- Matte Finish: A matte coat kills all reflections, producing a completely flat surface. It’s the go-to choice for heavily weathered warbirds, older fabric-skinned aircraft, or any machine that’s been baking in the sun and elements.
Your workflow should almost always start with a gloss coat. Once your base colors have fully cured, lay down a couple of light, even layers of gloss over the entire model. This silky-smooth surface is non-negotiable for getting decals to melt into the surface. After the decals and weathering are done, you'll apply a final satin or matte coat to nail the final look.
A gloss coat isn’t just for shine; it’s a technical tool. It fills in microscopic imperfections in the paint, creating a perfectly smooth surface that allows decals to adhere without any trapped air, ensuring a seamless, painted-on appearance.
The Art of Weathering and Storytelling
Weathering is pure magic. It's the process of faking the operational history of an aircraft—the oil stains, the exhaust soot, the paint chips, the mud splatters. This is what breathes life and soul into your model.
A clean, factory-fresh plane looks nice, but a weathered one tells a story. This is where your model transcends being a simple replica and becomes a convincing miniature.
Creating Depth with Panel Line Washes
One of the fastest ways to add instant realism is with a panel line wash. The technique is simple: you apply a very thin, dark paint—oils or enamels work best—over the model and let it flow into all the recessed panel lines, rivets, and other details.
Let it dry for a few minutes, then take a cotton swab lightly dampened with thinner and gently wipe away the excess from the raised surfaces. The dark paint stays behind in the recesses, creating a powerful illusion of shadow and depth. It makes every little detail pop. If you're looking for a great starting point, products like the Abteilung 502 Aircraft Effects Weathering Oil Paint Set give you the perfect colors right out of the box.
Simulating Real-World Wear and Tear
Panel lines are just the beginning. To really sell the story, you need to add more layers of authentic wear. Chipping effects, for instance, simulate areas where the paint has been scuffed off by maintenance crews, flying debris, or pilots climbing into the cockpit. You can do this with a fine-tipped brush for precise scratches or use a small piece of sponge for a more random, weathered pattern.
Streaking effects are another must-have. These simulate fluid leaks, rain marks, and engine exhaust stains, adding a dynamic sense of motion and use. We usually create these with oil paints or specialized weathering products. Just apply a few small dots of paint and then use a flat brush dampened with thinner to drag them downwards in the direction of airflow, creating a perfectly faded streak. For builders working on bare metal finishes, this guide on creating realistic brushed metal textures offers some great techniques for developing those convincing surfaces.
By thoughtfully combining these techniques, you'll elevate your model from a simple replica to a piece of art that truly captures the rugged, functional beauty of the real thing.
Common Questions About Aircraft Model Paint
No matter how well you plan, every modeling project has its "uh-oh" moments. Something doesn't look right, a finish comes out weird, or you're just not sure about a particular step. It happens to all of us. This section is all about tackling those common hurdles head-on with clear, practical answers to get you back to building.
Why Do My Decals Look Like Stickers?
Ah, the dreaded "silvering" effect. This is when a decal doesn't lay down flat, trapping microscopic air bubbles underneath that catch the light and give it a shiny, sticker-like look. It's frustrating, but thankfully, the fix is straightforward and all about the surface.
The secret weapon here is a gloss clear coat. Before you even think about decals, you need to spray a gloss finish over your model. This creates a perfectly smooth, glass-like surface. It fills in the microscopic peaks and valleys of the paint, leaving no room for air to get trapped. Once your decal is on that slick surface, a bit of decal setting solution will melt it into every panel line and curve for that perfect, painted-on appearance.
A gloss coat is the single most effective tool against decal silvering. It creates a frictionless surface that allows the decal to lay down perfectly flat, eliminating the air pockets that ruin an otherwise perfect finish.
How Can I Fix a Rough Airbrush Finish?
You spray a coat of paint, and instead of a smooth, even layer, it feels like sandpaper. This gritty, speckled finish is almost always a sign that the paint is drying in mid-air before it even reaches the model.
There are two usual suspects. First, your paint might be too thick. It needs to flow smoothly, so aim for a consistency like skim milk. If it's too thick, it won't atomize properly. Second, check your distance and pressure. You might be spraying from too far away, giving the paint droplets too much time to dry on their journey to the surface. Try getting a little closer or slightly lowering your air pressure (PSI). This ensures the paint lands wet, giving it a chance to level out smoothly.
Is a Primer Always Necessary?
Technically, you can slap paint directly onto bare plastic. But in modeling, taking shortcuts often means doing the work twice. Using a primer is a foundational step that makes a massive difference in the quality and longevity of your paint job. Here’s why it’s not worth skipping:
- Adhesion: Primer gives your paint something to bite into. It creates a uniform, slightly textured surface that paint grips onto far better than slick, smooth plastic.
- Flaw Detection: A quick coat of neutral gray primer is like a truth serum for your surface prep. It instantly reveals every missed seam line, tiny scratch, or glue smudge you’d never see on the raw plastic.
- Color Uniformity: It establishes a consistent base color, which is crucial for making your top coats look vibrant and true. No more weird color shifts over different shades of plastic.
While you’re perfecting the finish on your model, it can be fascinating to appreciate the engineering that powers the real thing. For those interested in the mechanics that make flight possible, you can learn more about advanced model aircraft engine design.
For all your modeling needs, from paints and primers to airbrushes and weathering supplies, Fusion Scale Hobbies has the selection you need to achieve professional results. Explore our huge range of products at https://fusionscalehobbies.com.