


If you're just starting out, the single best paint for plastic models is, without a doubt, acrylic. It's forgiving, cleans up with just water, doesn't stink up the house, and dries fast. That means less waiting and more building.
Choosing Your Perfect Paint for Plastic Models
Stepping into the paint aisle can feel a bit like staring down a wall of options, but it doesn't have to be intimidating. While acrylics are a fantastic starting point for almost anyone, the world of model paints has so much more to offer—specialized formulas that can take your project from just "good" to truly incredible.
Think of this as your workshop guide. We'll get into why enamels are the undisputed champions for durability and weathering, and how lacquers create those flawless, glass-smooth finishes you see on professional builds. The goal here is to give you the confidence to pick the right paint for the job and turn that box of plastic parts into something you're proud to display.
Making the Right Choice for Your Project
The popularity of acrylics isn't just a hunch; the numbers back it up. In 2023, the global market for acrylic model paints was valued at around USD 1.2 billion. It's projected to more than double to USD 2.4 billion by 2032. This explosion in growth shows just how dominant they've become, thanks to a huge community of hobbyists who want paints that are safe and easy to use. You can discover more insights about this trend and market projections for model paints.
To make things even simpler, this decision tree breaks down which paint type is best based on your main goal.
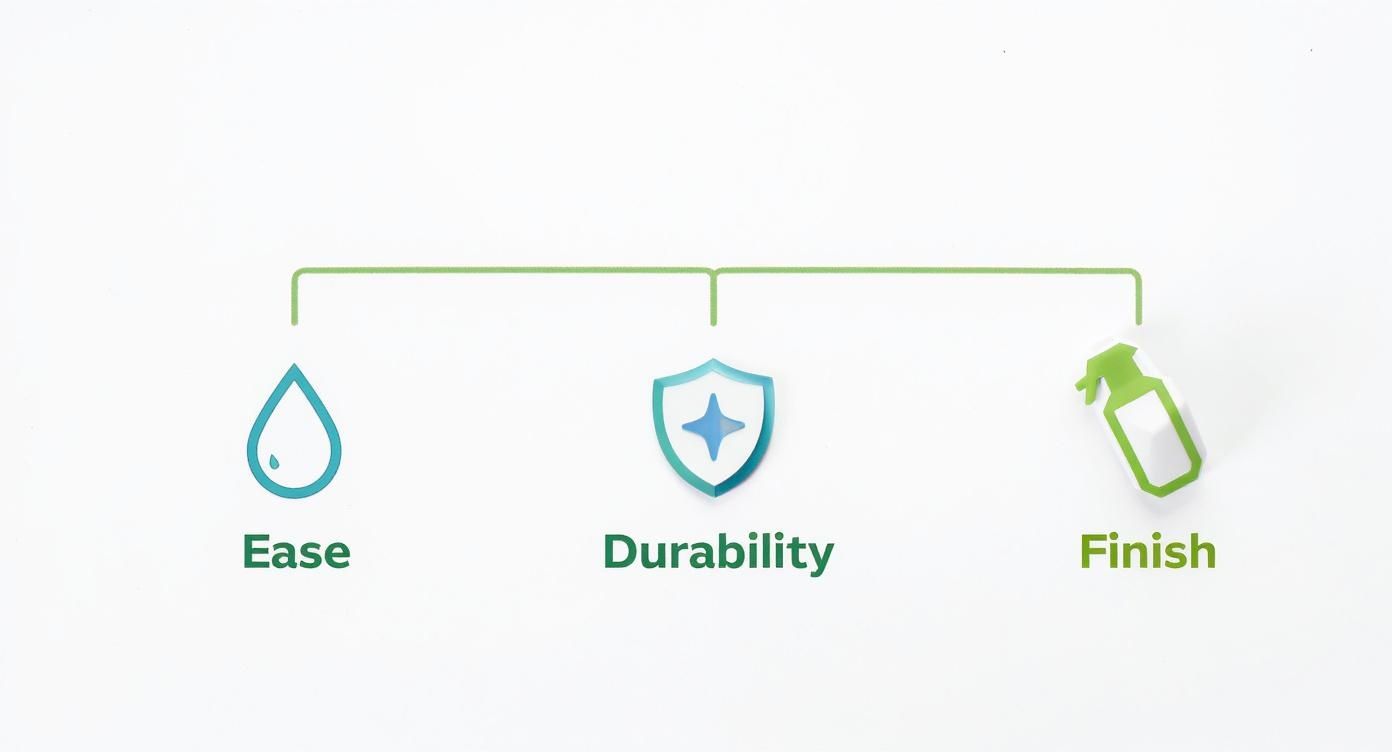
As the infographic makes clear, if you're prioritizing ease of use, water-based acrylics are your best bet. If you need a rock-hard finish that can stand up to handling, go for enamels. And for that ultimate, show-car shine? Lacquers are king.
To help you decide at a glance, here’s a quick breakdown of the three main players on your workbench.
Quick Paint Comparison for Model Builders
This table sums up the core differences between acrylics, enamels, and lacquers to help you quickly match a paint type to your project's needs.
| Paint Type | Best For | Cleanup | Dry Time | Durability |
|---|---|---|---|---|
| Acrylic | Beginners, quick projects, brush painting | Water | Fast | Good |
| Enamel | Durability, weathering, glossy finishes | Mineral Spirits | Slow | Excellent |
| Lacquer | Ultra-smooth finish, airbrushing | Lacquer Thinner | Very Fast | Very Good |
Each paint has its own personality and place in the hobby. Understanding their strengths is the first step toward mastering your finishing techniques.
In the end, the "best" paint is the one that fits what you're trying to accomplish.
- Acrylics: The go-to for beginners, fast builds, and anyone who wants to avoid harsh fumes.
- Enamels: Unbeatable for realistic weathering effects, high-gloss car bodies, and parts that need to be tough.
- Lacquers: The professional's choice for a silky-smooth, flawless finish, especially when you're using an airbrush.
The Three Essential Types of Model Paint
Stepping into the world of model paints for the first time can feel like learning a new language. You’ll hear terms like acrylic, enamel, and lacquer thrown around, and each one comes with its own set of rules and behaviors. But don't worry—once you get the hang of the core differences, you'll see them not as confusing options, but as a versatile toolkit ready to bring any vision to life.
Think of these three paint families like different types of engines. Each one gets your model down the road, but they do it in fundamentally different ways, offering unique performance for specific jobs. The real difference is their base—the liquid carrier that holds the pigment and dictates how the paint behaves.
Acrylic Paints: The Forgiving All-Rounder
Acrylics are the modern workhorse of the modeling world. Their base is primarily water, making them the most user-friendly and approachable option out there, especially if you're just starting out.
If paints were cooking ingredients, acrylics would be olive oil—versatile, easy to work with, and a staple in every kitchen. They have a very low odor, and cleanup is as simple as rinsing your brushes with plain water. This ease of use is a huge reason for their popularity. The broader market reflects this trend; the global paints and coatings industry, valued at USD 211.28 billion in 2024, sees water-based coatings like acrylics holding a massive 40.8% revenue share. Read more about the global paints and coatings market trends on Grandviewresearch.com.
Their biggest advantage is the lightning-fast drying time. A thin coat can be touch-dry in just a few minutes, letting you move on to the next color or layer without long, frustrating delays. This is fantastic for productivity but demands a quick hand, as the paint can sometimes start drying on your brush if you’re not careful.
Key Takeaway: Acrylics are your go-to for low-fume, easy-cleanup sessions. Their fast drying nature is perfect for layering colors, but you have to work efficiently to keep the paint from drying on your palette or brush.
Enamel Paints: The Durable Traditionalist
Before acrylics took center stage, enamels were the undisputed king of the hobby. These are oil-based paints, which gives them a completely different personality and set of properties.
Think of enamels as classic oil house paint, but made for miniatures. They take much longer to dry—sometimes up to 24 hours to fully cure. This might sound like a drawback, but it’s actually one of their greatest strengths. The slow drying time allows the paint to “self-level,” meaning any brush strokes have time to flatten out and disappear, leaving behind a smooth, hard shell.
This tough, resilient finish makes enamels perfect for a few key jobs:
- Gloss Coats: They create a beautiful, deep shine that’s hard to beat for model cars and aircraft.
- Weathering: Their durability means they can withstand the harsh solvents used in weathering washes and effects without being damaged.
- Small Details: The longer working time is a blessing for hand-painting intricate details without the paint drying on you halfway through.
The trade-off? The cleanup and the smell. You'll need mineral spirits or a dedicated enamel thinner to clean your brushes, and good ventilation is an absolute must because of the strong fumes. For a deeper dive into how these two paint types stack up, check out our detailed comparison in the acrylic vs enamel model paint guide.
Lacquer Paints: The High-Performance Specialist
Lacquers are the high-octane fuel of the paint world. They use a powerful, "hot" solvent base that dries incredibly fast and actually bites into the plastic surface, creating a superior bond.
Using lacquer is like bringing in a professional automotive painter. The results are second to none—an exceptionally thin, smooth, and hard finish that preserves every microscopic detail on your model. Lacquers are the secret behind those flawless, almost liquid-like surfaces you see on contest-winning models.
However, this level of performance comes with some strict requirements.
- Airbrush Only: Lacquers are generally not suitable for brush painting. They dry almost instantly, making smooth application by hand nearly impossible.
- Aggressive Solvents: The thinner is extremely potent and will melt plastic if you apply it too heavily. It can also reactivate underlying coats of acrylic or enamel paint if they aren't fully cured and protected by a barrier coat.
- Safety is Paramount: A high-quality respirator and a spray booth with proper ventilation are non-negotiable. The fumes from lacquers are the most toxic of the three types.
Because of their demanding nature, lacquers are typically reserved for experienced modelers chasing that absolute best finish, particularly for base coats and clear topcoats. They offer unparalleled smoothness but demand respect and the right safety gear.
Now that we've covered the basics of each paint type, let's break down their characteristics side-by-side. This table will help you see exactly how they compare and choose the best paint for your specific project, skill level, and working environment.
Detailed Paint Characteristics and Use Cases
| Characteristic | Acrylic Paint | Enamel Paint | Lacquer Paint |
|---|---|---|---|
| Base / Thinner | Water or alcohol-based acrylic thinner | Mineral spirits, turpentine, or enamel thinner | Dedicated lacquer thinner |
| Drying Time | Fast: 5-20 minutes to touch-dry | Slow: 6-24 hours to cure | Very Fast: 1-5 minutes to touch-dry |
| Finish Durability | Good, but can scratch without a topcoat | Very Durable: Hard, resilient shell-like finish | Extremely Durable: Hardest and most resilient finish |
| Cleanup | Easy; water for water-based, alcohol/thinner for alcohol-based | Requires mineral spirits or enamel thinner | Requires strong lacquer thinner |
| Odor / Fumes | Low to moderate odor | Strong solvent odor; requires good ventilation | Very Strong/Toxic Fumes: Respirator and spray booth essential |
| Application | Excellent for brush and airbrush | Good for brush (self-leveling), good for airbrush | Airbrush primarily; not suitable for brush painting |
| Best For | Beginners, layering, low-fume environments, general purpose | Hand-painting details, gloss finishes, weathering base | Flawless base coats, high-gloss topcoats, preserving fine detail |
| Compatibility | Safe over fully cured enamels and lacquers | Can damage uncured acrylics; safe over cured lacquers | "Hot" solvent: will damage underlying acrylic/enamel if not cured/protected |
Choosing the right paint isn't about finding the single "best" one, but about understanding which tool is right for the job at hand. An experienced modeler will often have all three types on their bench, using each one for its unique strengths to achieve the perfect result.
How to Prepare Your Model for a Flawless Finish
A spectacular paint job isn’t just about the paint you choose or how steady your hand is. It’s built on the foundation you create long before you even think about popping open a bottle of color. In fact, skipping these initial prep steps is the single biggest reason modelers end up with peeling paint, rough finishes, and a whole lot of frustration.
Think of it like painting a wall in your house. You wouldn’t just slap a coat of paint over dirt and expect it to look good or last long. The same logic applies here, but instead of dust and grime, you’re up against microscopic residues from the factory.
Start with a Clean Slate
Every single plastic model kit arrives with a hidden enemy already on its surface: mold release agent. This is a slippery, oily substance used in the factory to help the plastic parts pop out of the metal molds without sticking. If you leave it on, it will actively push your paint away, causing it to bead up, flake off, or just refuse to stick properly.
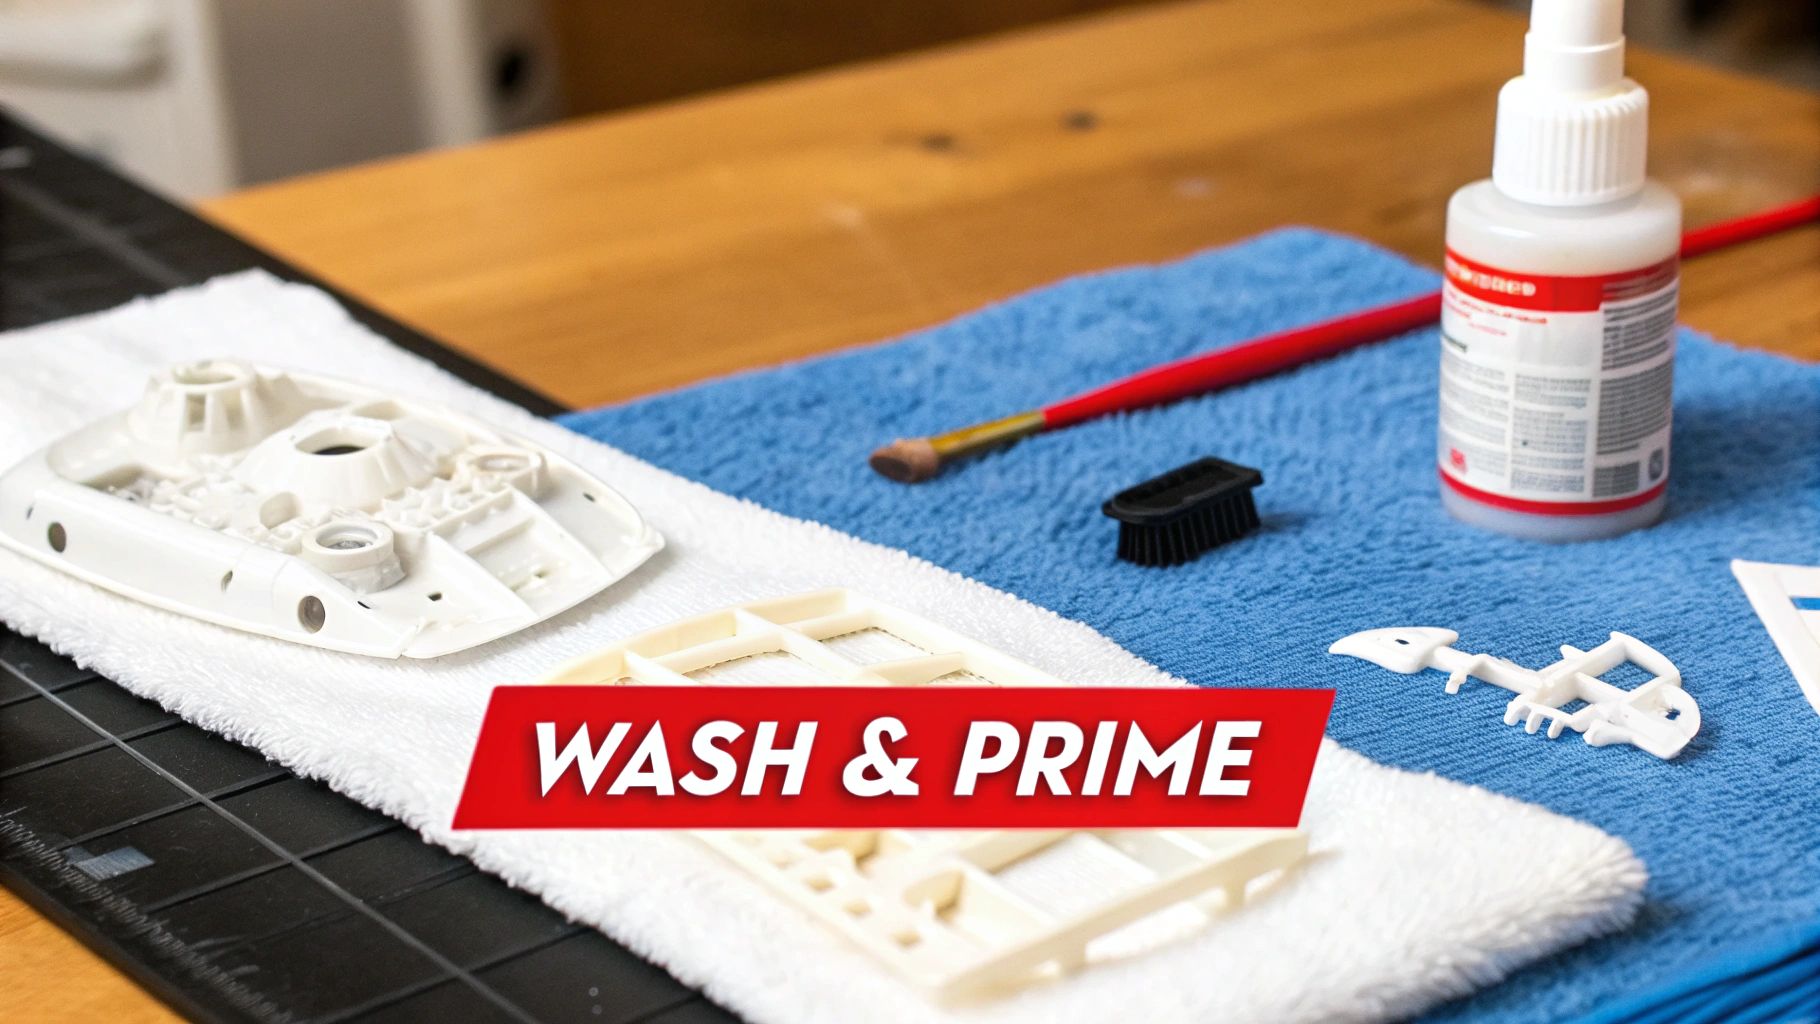
That’s why washing your model parts isn't just a good idea—it's a non-negotiable first step.
- Get the Big Parts Off: Carefully clip the main components like the fuselage, hull, or chassis from their sprues. It’s best to keep the tiny, delicate pieces on the frame for now so they don’t get lost down the drain.
- Give Them a Bath: Grab a bowl of warm water and add a few drops of mild dish soap. Use an old, soft-bristled toothbrush to gently scrub each part, getting into all the nooks and crannies to lift off any residue.
- Rinse and Dry Completely: Rinse everything under cool, clean water. Then, lay the parts out on a paper towel to air dry. Be patient here—any lingering moisture can cause its own set of problems later on.
This quick bath gives your primer and paint a perfectly clean, grease-free surface to grab onto. It’s a fundamental principle in the wider coatings industry, which is seeing huge growth. The global plastic coatings market was valued at around USD 8.12 billion in 2024 and is expected to hit USD 13.85 billion by 2032, all driven by the need for durable, beautiful finishes in hobbies and industry. You can read the full research on the plastic coatings market and its drivers on databridgemarketresearch.com.
The Critical Role of Primer
Once your parts are clean and dry, the next mission-critical step is applying a primer. If washing the model removes the stuff that prevents paint from sticking, primer is what actively helps it stick.
A primer is a special type of paint designed to bond tightly to bare plastic. It creates a consistent, uniform surface with a microscopic texture—often called "tooth"—that gives your color coats something to grip tenaciously. This dramatically boosts both paint adhesion and durability.
Skipping primer is a gamble that almost never pays off. Not only does it lock your paint down, but it also has a secret superpower: it reveals surface flaws. Any faint seam lines, sanding marks, or imperfections you might have missed will suddenly stand out, giving you one last chance to fix them before you lay down your colors.
Of course, sometimes mistakes happen and you need a do-over. It’s always good to know how to remove paint from plastic model kits without damaging the plastic underneath.
Choosing Your Primer Color
Primer isn’t just a functional layer; it’s an artistic tool. The color you choose as your base will fundamentally change the tone and mood of your final paint job.
- Gray Primer: This is the workhorse, the go-to for most projects. It’s a neutral base that works well under just about any color, providing a balanced foundation that won’t dramatically alter your hues. It’s the perfect all-rounder.
- White Primer: Use this when you’re working with bright, vibrant colors like yellow, red, or orange. A white base makes these colors pop with an intensity they just can't achieve over a darker primer.
- Black Primer: This is your secret weapon for creating deep shadows and dramatic, moody finishes. It’s a favorite for military models, sci-fi subjects, and a technique called "black-basing," where you intentionally leave the deepest recesses black to create instant, natural-looking shadows.
By taking the time to wash and prime your model, you’re not just going through the motions—you’re setting the stage for success. This prep work ensures that the best paints for plastic models can perform exactly as they were designed, giving you that smooth, durable, and professional-looking finish you’re aiming for every time.
Mastering Brush Painting and Airbrushing Techniques
With your model clean and primed, you’ve arrived at the best part: applying color. This is where your creation stops being a collection of plastic parts and starts developing a personality. The two main roads you can take are the classic, hands-on paintbrush and the high-tech, high-performance airbrush.
This isn’t about which one is “better.” It’s about picking the right tool for the job. Most experienced modelers have both on their workbench, grabbing a brush for fine details and an airbrush for those big, smooth surfaces. Learning how to use each will give you a massive advantage and open up a whole world of creative options.
The Art of Brush Painting
Brush painting is how most of us get our start. It’s accessible, the initial investment is low, and it’s perfect for detailed work like cockpits, figures, and other small components. The number one challenge everyone faces at first is avoiding those ugly, thick brush strokes that can completely ruin a model’s finish.
The secret isn't a hundred-dollar brush; it’s all about the consistency of your paint. Straight out of the pot, most model paints—especially acrylics—are way too thick. Slathering that on will create a lumpy, streaky mess that hides all the fine details you’re trying to bring out.
Pro Tip: Your goal is to thin your paint to the consistency of milk. This allows it to flow beautifully from the brush and self-level as it dries, which magically erases brush strokes and leaves a clean, even coat. Remember: two or three thin coats are always better than one thick, goopy one.
Figuring out the right thinning ratio is a core modeling skill. It changes between brands and even between different colors from the same brand. For a deep dive on getting that perfect consistency, we have a complete guide on how to thin acrylic paint for models that walks you through it.
Unlocking Potential with an Airbrush
If a paintbrush is a fine-tipped pen, think of an airbrush as a professional spray gun shrunk down for miniature work. It uses compressed air to atomize paint into a super-fine mist, letting you lay down incredibly smooth layers of color with zero brush strokes in sight.
An airbrush is a total game-changer for a few key reasons:
- Seamless Base Coats: It’s the undisputed king of applying flawless, even base coats over large areas like an airplane’s wings or a tank's hull.
- Advanced Effects: It unlocks sophisticated techniques like pre-shading, post-shading, and creating subtle color fades that are almost impossible to do by hand.
- Incredible Control: Once you get the hang of it, you can spray hair-thin lines, making it perfect for complex camouflage patterns.
Getting started does involve a steeper learning curve and a higher upfront cost for the airbrush and a compressor, but the results are absolutely worth it. And just like with a brush, thinning your paint is non-negotiable. A consistency close to skim milk is what you're aiming for to ensure the paint flows smoothly without clogging the nozzle.
Essential Tools and Workspace Organization
Whether you stick with a brush or go all-in on an airbrush, an organized workspace will make your painting sessions so much more enjoyable. There’s nothing worse than frantically hunting for a tool or a specific paint color mid-process. To truly get the hang of these techniques, it's just as important to have a good system for organizing your craft supplies.
Here are a few must-haves for either method:
- Palette: You need something to mix and thin your paints on. A simple ceramic tile from a hardware store works great, but many modelers swear by a wet palette. It uses a damp sponge and special paper to keep acrylics from drying out during long painting sessions.
- Quality Brushes: You don't need a whole arsenal, but a few good brushes are essential. A size 2 round brush is a fantastic workhorse for most jobs, while a smaller size 0 will be your best friend for the tiniest details.
- Cleaning Supplies: For acrylics, keep water and paper towels close. For enamels and lacquers, you’ll need their specific thinners and some glass jars for cleaning your tools. Keeping your airbrush clean is especially critical to prevent clogs and ensure it works when you need it.
Ultimately, becoming skilled with both the brush and the airbrush will make you a far more versatile and capable modeler. Start with the brush to get a feel for how paint behaves. When you’re ready to chase that factory-perfect finish, an airbrush will be there to take your models to a whole new level. The best paints for plastic models truly shine when they're applied with the right technique and a little bit of patience.
Matching the Right Paint to Your Model Subject
Knowing the theory behind paints and primers is one thing, but the real fun begins when you match the right paint to the story your model is telling. Different subjects have totally different needs, and picking the best paints for your plastic models is what separates a good build from a truly stunning one. An armored vehicle needs a gritty, dead-flat finish, while a classic sports car demands a liquid-smooth gloss that looks a mile deep.

Let's shift from the general "how-to" and get specific, connecting paint theory to the models you actually love to build. Think of this as your practical roadmap for choosing paints that nail the authenticity and character of your favorite genres.
For Military Models, Armor, and Dioramas
Authenticity is the name of the game in military modeling. The entire goal is to replicate vehicles that have seen hard use in the field, which means the finish has to be completely non-reflective. A tank hull that catches the light just looks wrong and instantly breaks the illusion of scale.
- Ultra-Matte Finish: Your number one priority is an ultra-matte or dead-flat finish. Anything with a sheen will look like a toy. Acrylics from brands like AK Interactive and Vallejo's Model Color line are formulated specifically for this, drying to a perfectly flat finish right out of the bottle.
- Historical Accuracy: Getting the color right is non-negotiable. Many paint lines offer dedicated color sets matched to specific armies and eras, which takes all the guesswork out of finding the correct shade of Olive Drab or Panzer Grey.
- Weathering Durability: Military models get beat up—that's part of the appeal! While acrylics are fantastic for the base coat, many modelers prefer using tough enamels or oils for weathering effects like washes and filters. Why? Because they won’t reactivate and mess up the cured acrylic layer underneath.
For Aircraft Models
Aircraft models are a unique challenge because their finishes are all over the place. A single plane might have matte camouflage on its upper surfaces, a semi-gloss sheen on its belly, and high-gloss markings or insignia.
The secret here is using different topcoats or varnishes to control the final look. You can lay down a single matte base color across the whole model and then use a brush or airbrush to apply gloss varnish over specific panels or decals to replicate that varied, realistic appearance.
The finish also needs to be incredibly smooth to prevent "silvering"—those tiny, distracting air bubbles trapped under a decal. Lacquer-based gloss coats are a modeler's best friend for this, as they create a hard, glass-like surface that decals just love to adhere to.
For Sci-Fi, Gundam, and Mecha
This is where you get to throw the rulebook out the window and let your imagination fly. Sci-fi modeling isn't about replicating reality; it's about creating something otherworldly. That calls for paints with special properties that sell the illusion of advanced technology and alien materials.
Key Insight: While realism is the engine for military modeling, sci-fi thrives on pure visual impact. This genre is the ultimate playground for experimenting with paints that produce dramatic, eye-catching effects, turning simple plastic into something that looks futuristic and dynamic.
Here are a few paint types to get you started:
- Vibrant Metallics: Look for paints with super finely ground metallic pigments that give a believable metal sheen. Alcohol-based acrylics like Tamiya's or lacquer-based paints from Mr. Hobby are legendary for their brilliant, smooth metallic finishes.
- Color-Shifting Paints: Sometimes called "chameleon" or pearlescent paints, these shift colors depending on how the light hits them. It's the perfect way to create a high-tech, exotic look that screams futuristic.
- Fluorescent and Luminous Paints: Want parts of your model to glow under a blacklight or in the dark? Fluorescent and glow-in-the-dark paints are awesome for engine exhausts, energy weapons, or cockpit displays, adding a cool, interactive element to your finished build.
For Automotive Models
When it comes to cars and trucks, you're chasing the complete opposite of a military tank. The holy grail here is the perfect, high-gloss "showroom" finish. Achieving this is all about building up multiple thin, smooth layers and being meticulous with your surface prep.
Lacquers are the undisputed kings of this category. Nothing else can be wet-sanded and polished to a mirror-like shine quite like they can.
The process often involves applying several thin coats of lacquer color, followed by even more layers of a clear gloss lacquer. Once that has fully cured—and you have to be patient—the surface can be wet-sanded with ultra-fine grit sandpaper and then polished with compounds to create that flawless, deep gloss that perfectly mimics a real automotive paint job.
Applying Topcoats, Weathering, and Safety First
Once the final color is down, your model might look painted, but it’s far from finished. The last couple of steps—applying a protective topcoat and adding realistic weathering—are what separate a good model from a truly fantastic one. This is also the stage where safety becomes absolutely critical, ensuring you can enjoy this hobby for years to come.
Think of a topcoat, or varnish, as the armor for your paint job. It’s a clear layer that seals all your hard work, protecting it from fingerprints, dust, and general wear and tear. More importantly, it gives you final control over the model's appearance by dictating its sheen.
- Gloss Coat: Creates a shiny, reflective surface. A gloss coat is essential before applying decals because it creates an ultra-smooth foundation that prevents tiny air bubbles (silvering) from getting trapped underneath.
- Satin Coat: Offers a slight, subtle sheen. It's perfect for replicating the look of many modern aircraft, civilian cars, or well-maintained machinery.
- Matte Coat: Provides a completely flat, non-reflective finish. This is the go-to for almost all military vehicles, heavily weathered subjects, and anything that needs to look gritty and used.
Bringing Your Model to Life with Weathering
With the paint sealed and the sheen set, you can dive into weathering. This is the art of making your model look like a real, in-service object rather than a pristine toy fresh off the assembly line. Simple techniques like washes—thin, dark paint that flows into panel lines and recesses—and dry brushing—using an almost-dry brush to highlight raised details—add incredible depth and realism.
These effects transform a flat, single-color surface into something with a history and a story. The real key here is to build these effects slowly and subtly. When it comes to making a model look authentically worn, less is almost always more.
Safety Is Not Optional
While you’re creating these amazing finishes, your health has to be the number one priority. The chemicals in many model paints, thinners, and especially topcoats release volatile organic compounds (VOCs) that are genuinely harmful to breathe in. This is particularly true for enamels and lacquers.
Crucial Safety Reminder: Always work in a well-ventilated area. A spray booth that vents fumes directly outside is the ideal setup. When spraying lacquers and enamels, a respirator mask fitted with organic vapor cartridges is non-negotiable. Your lungs are not a replaceable part of your toolkit.
Understanding how protective layers work is a key concept in many industries. To see this idea in a different context, it can be interesting to explore how advanced solutions like ceramic coatings provide durable, long-lasting finishes for automotive paint. Just like in modeling, that final protective coat is what locks in a high-quality result. By protecting both your model and yourself, you ensure the final steps of the process are as rewarding as the first.
Common Questions About Painting Plastic Models
Even when you follow all the steps, painting can throw a curveball your way. Unexpected issues pop up, and questions arise mid-build. This section tackles some of the most common problems modelers run into, giving you quick answers to get you back on track.
Can I Mix Different Paint Types?
You should never mix different paint types—like acrylics and enamels—in the same jar or airbrush cup. Their chemical makeup is completely incompatible. If you try, you'll end up with a useless, gummy sludge instead of paint. It’s like trying to mix oil and water; they just won't play nice.
However, you can absolutely layer them. This is where things get interesting. The trick is to let the first layer cure completely, then seal it with a clear varnish. A classic pro technique is to lay down a smooth acrylic base coat, protect it with a gloss topcoat, and then apply durable enamel washes for weathering effects.
Why Is My Paint Peeling Off?
If your paint is flaking or peeling off, the culprit is almost always poor surface prep. Every plastic model kit comes out of the mold with a thin, slippery layer of mold release agent on it, which is designed to repel pretty much everything—including your paint. You have to wash every part with warm, soapy water and let it air dry completely before you do anything else.
The second non-negotiable step is primer. A quality primer creates a micro-textured surface that gives your paint something to grab onto. Skipping either of these steps is the #1 reason paint fails to stick.
Key Insight: Think of surface prep not as an optional step, but as the foundation of your entire paint job. A clean, primed surface is the only way to guarantee the best paints for plastic models can form a strong, lasting bond.
At Fusion Scale Hobbies, we carry everything you need to build a flawless finish, from essential primers to a massive selection of acrylic, enamel, and lacquer paints. Explore our full range of modeling supplies at fusionscalehobbies.com.